Securing your mail keeps other people from being able to get your (email) password, or read the email as it goes between the server and your iOS device.
There are all manner of other issues with email (addressed in this post about email security) which we won’t be discussing here. This also does not address doing email encryption with products like PGP/GPG, or SMIME.
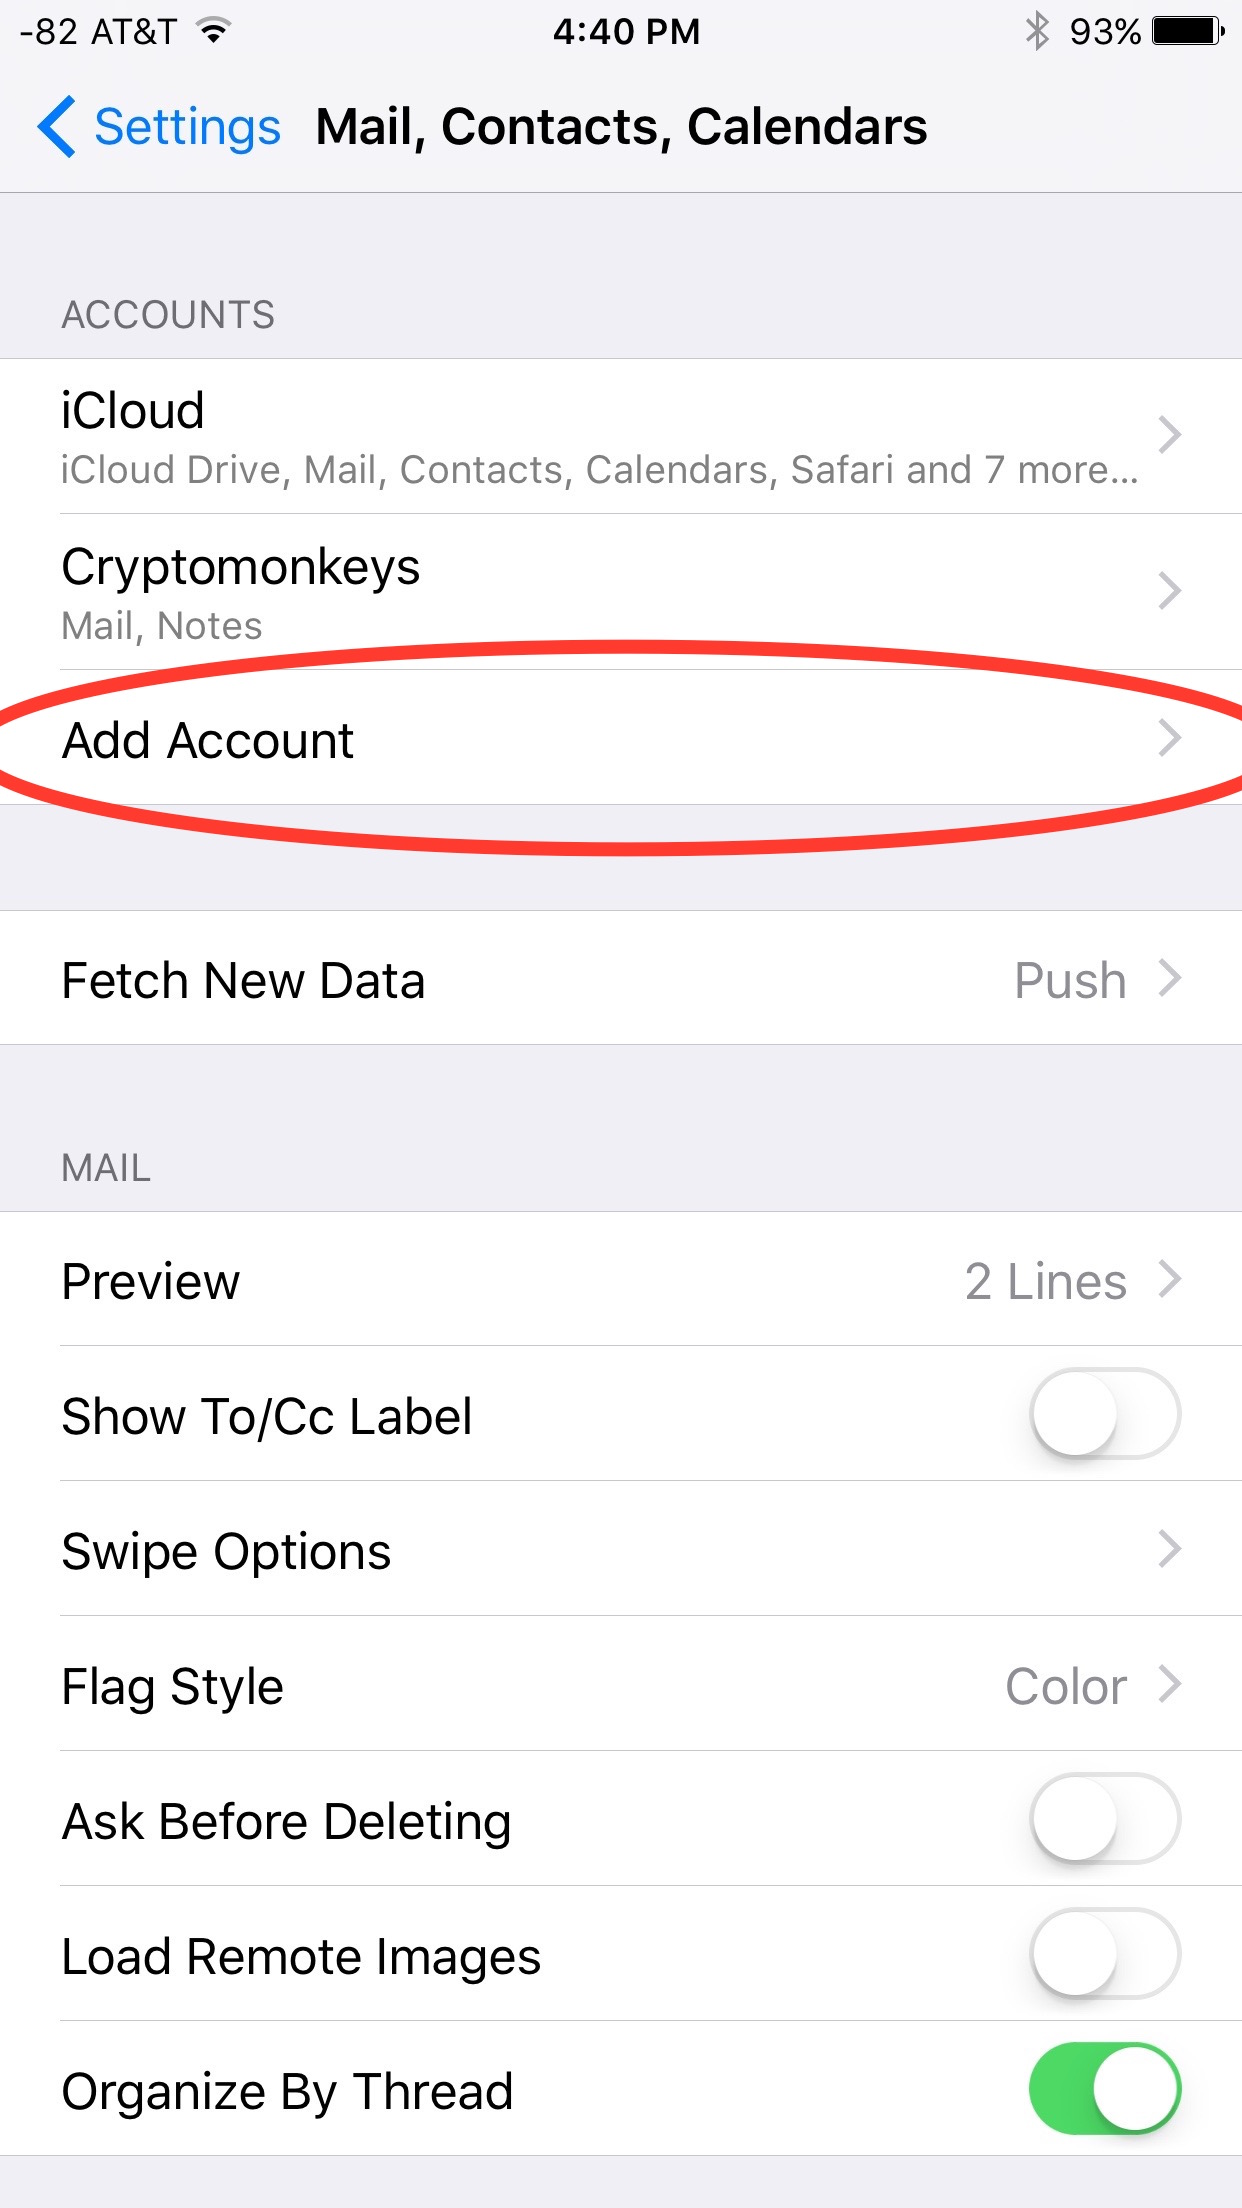
Mail, Contacts, Calendars
We start by going to Settings → Mail, Contacts, Calendars.

I’m assuming you’re adding an account. If you are modifying an existing account, you can skip the first few steps, and simply navigate to the advanced settings for the email account you wish to secure. Then, you can follow along and ensure the SSL settings are correct, along with the ports.
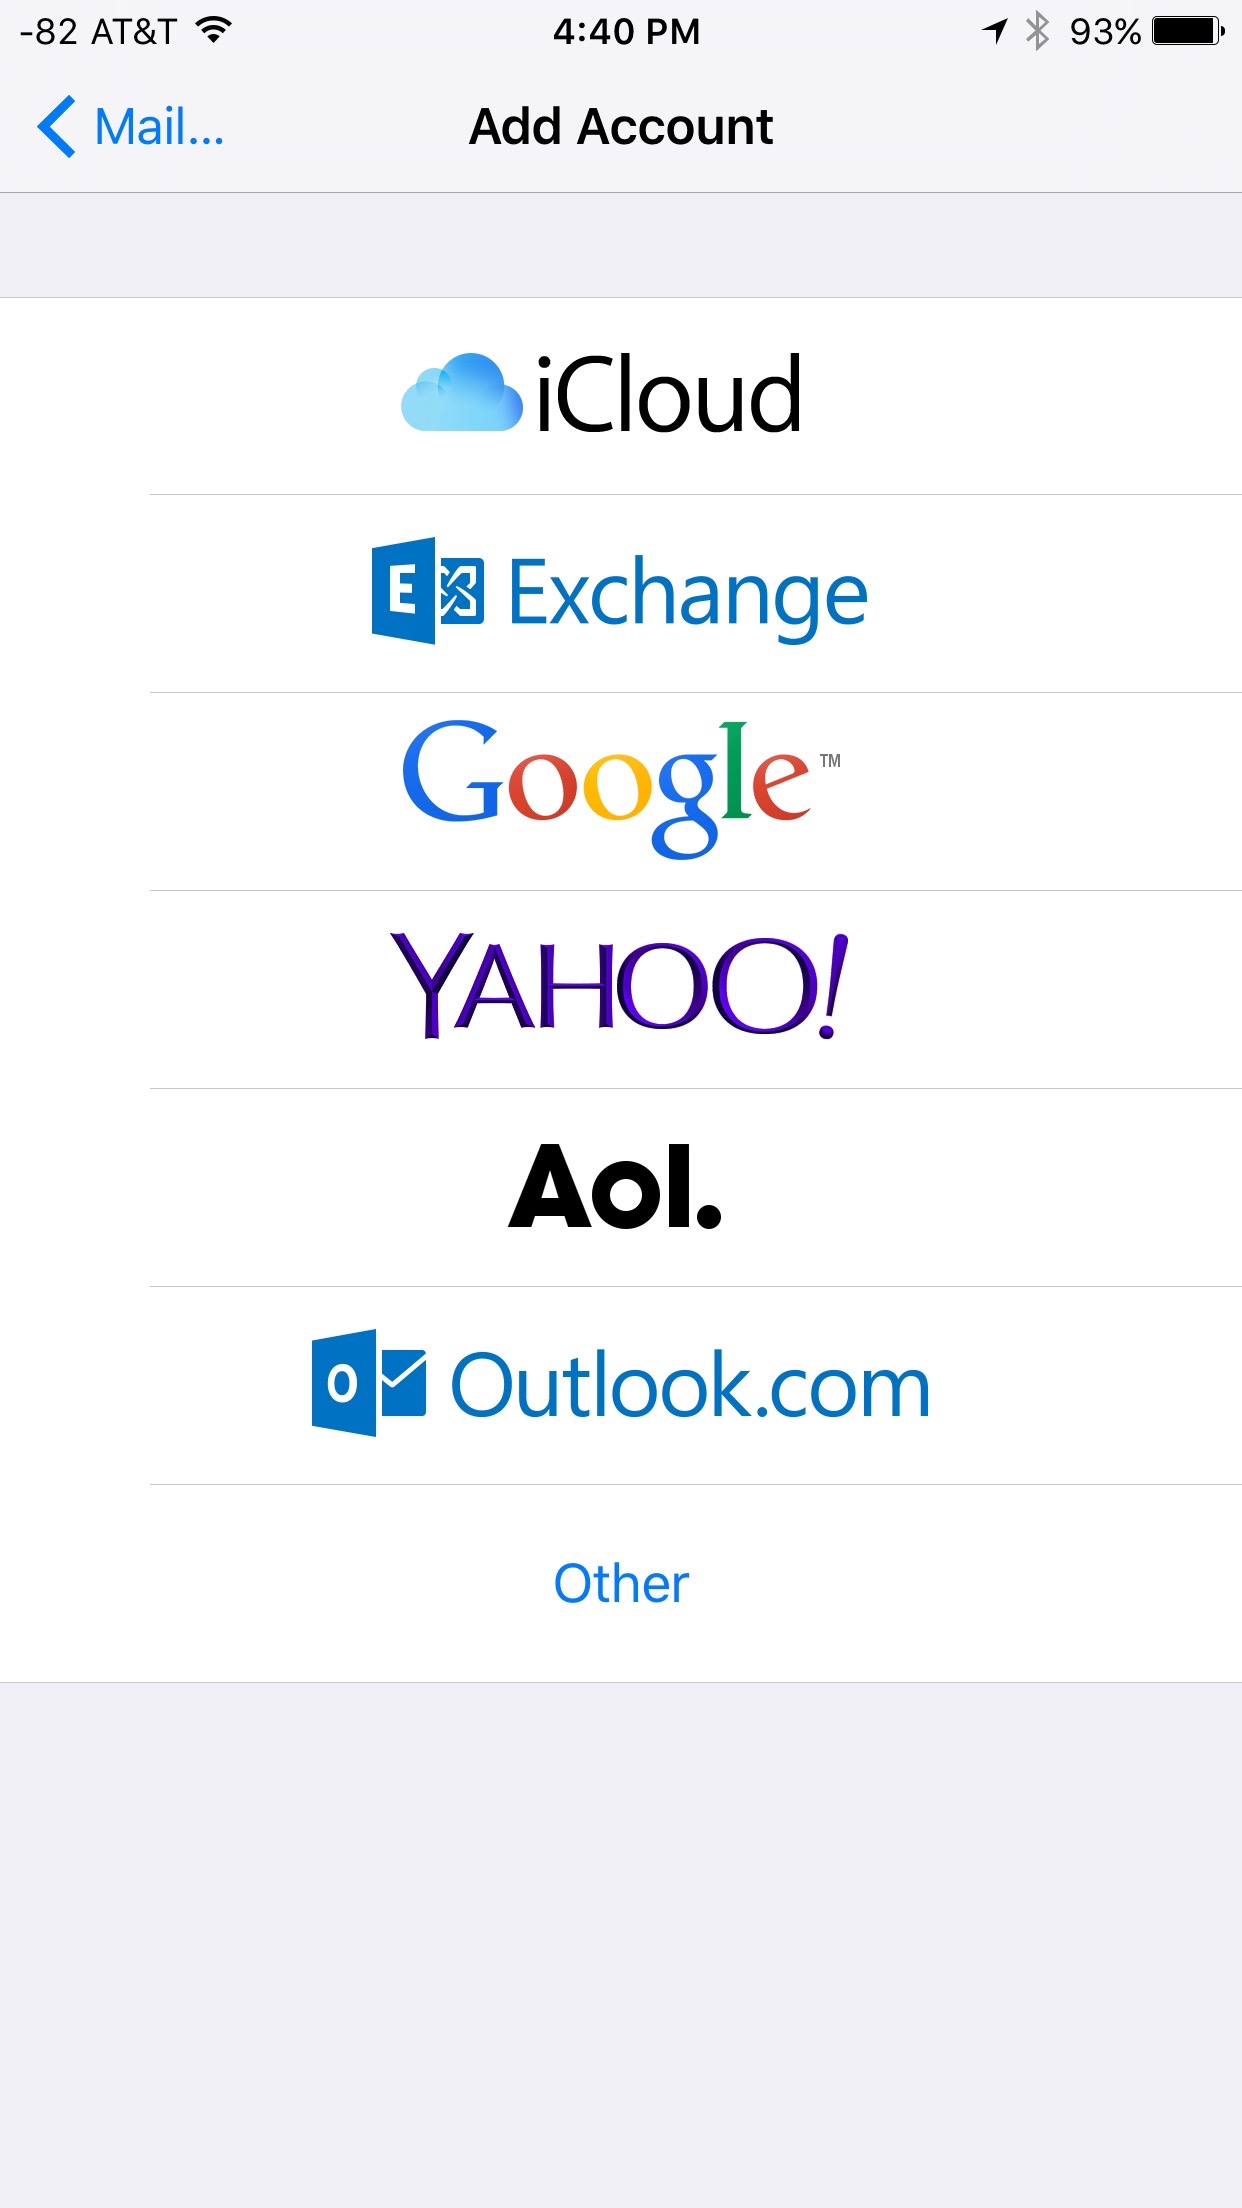
Here, you get to choose what kind of account you want to create. I have my own mail server, so I select “Other”.
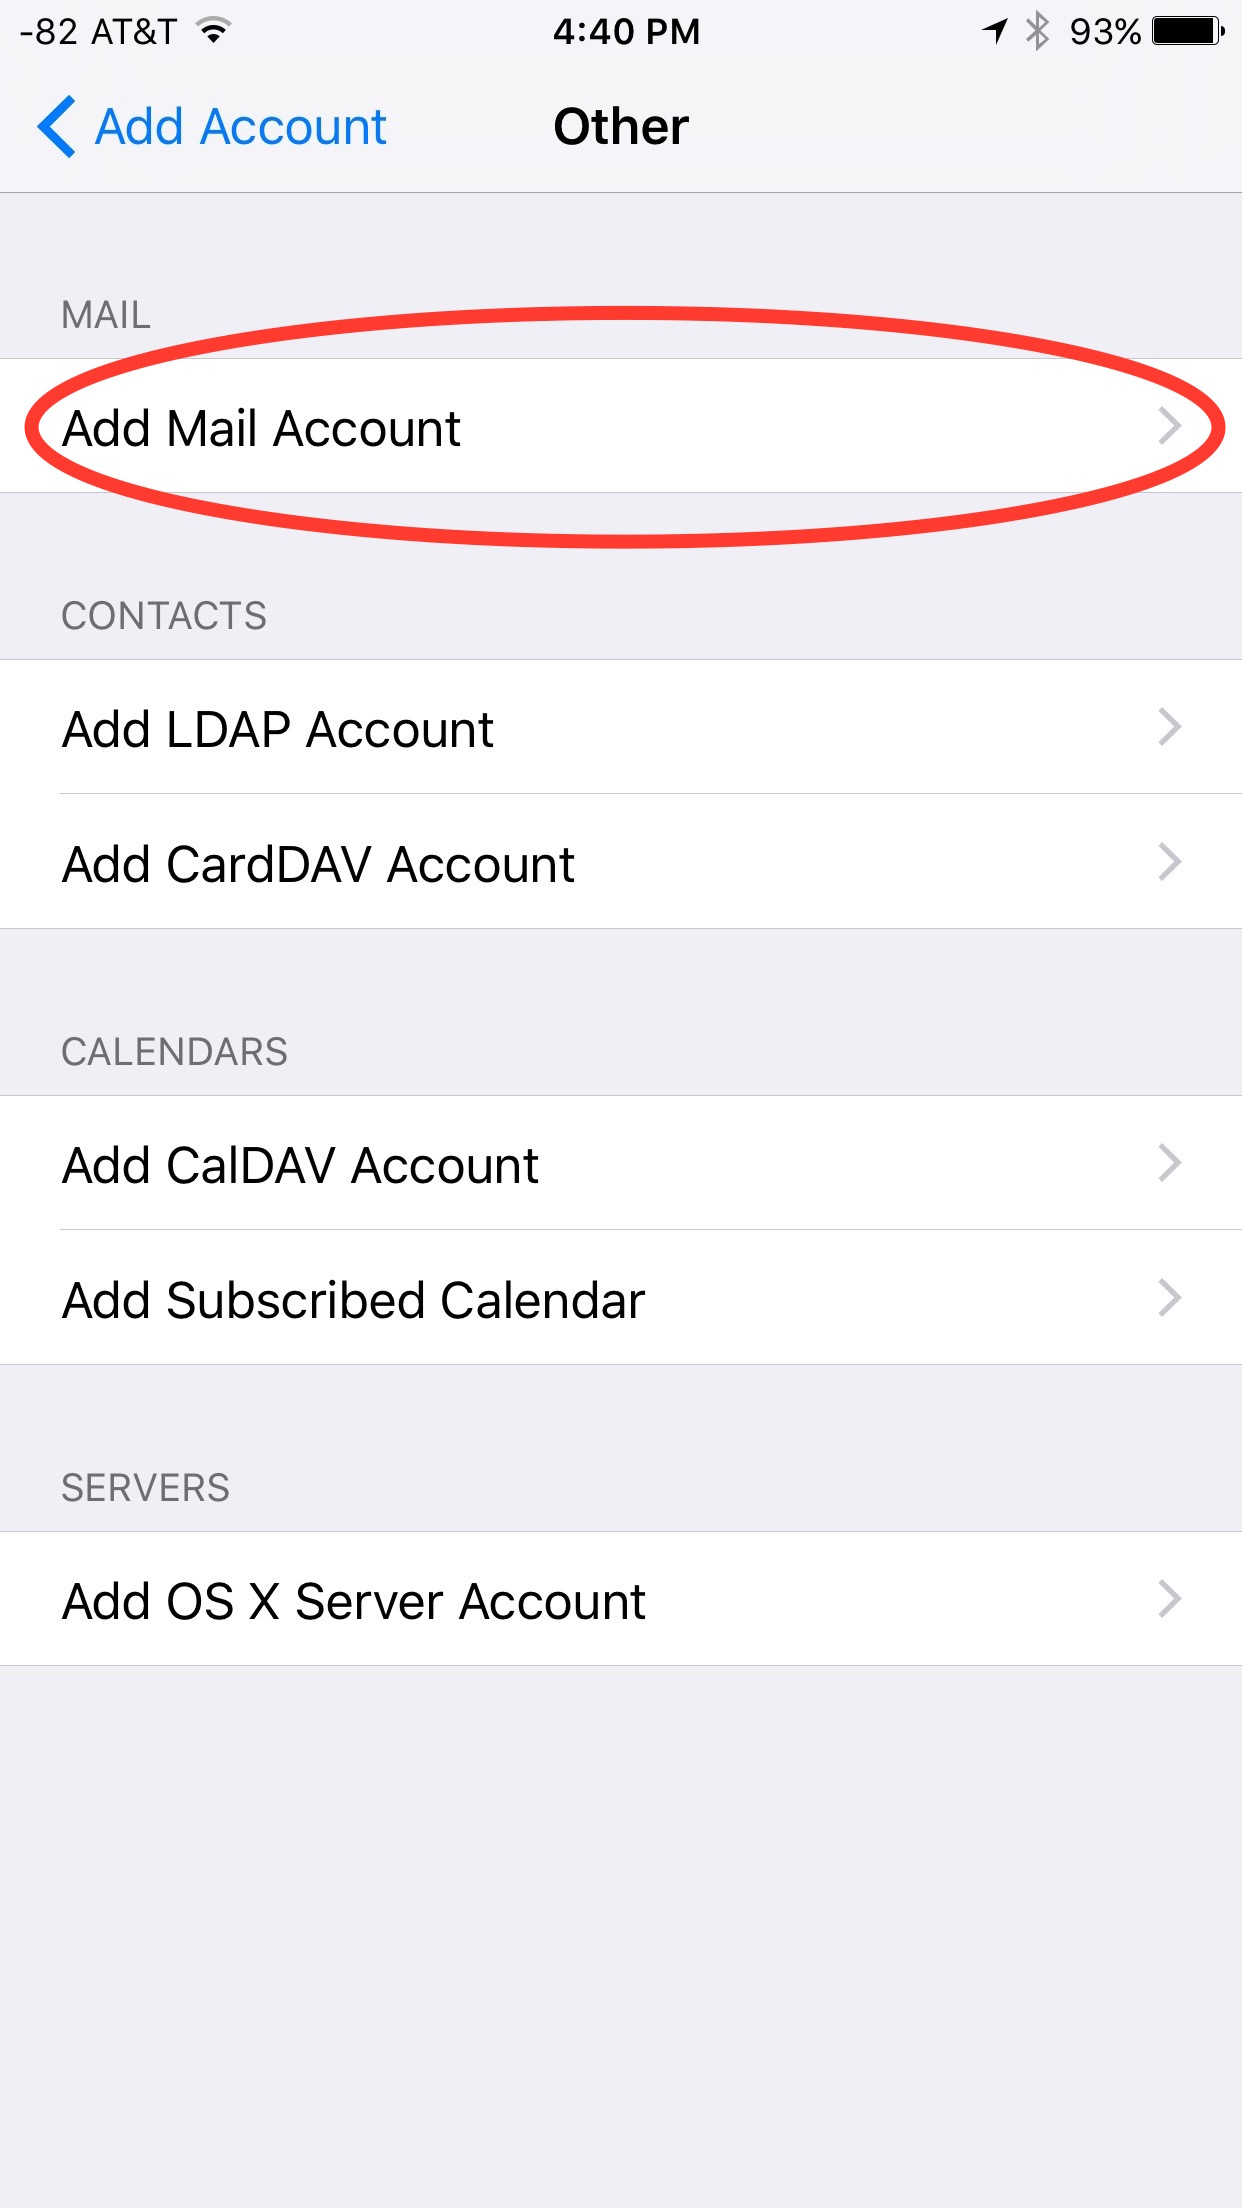
We can add a variety of different types of account under the category of “Other”. We want to add a “Mail account”.
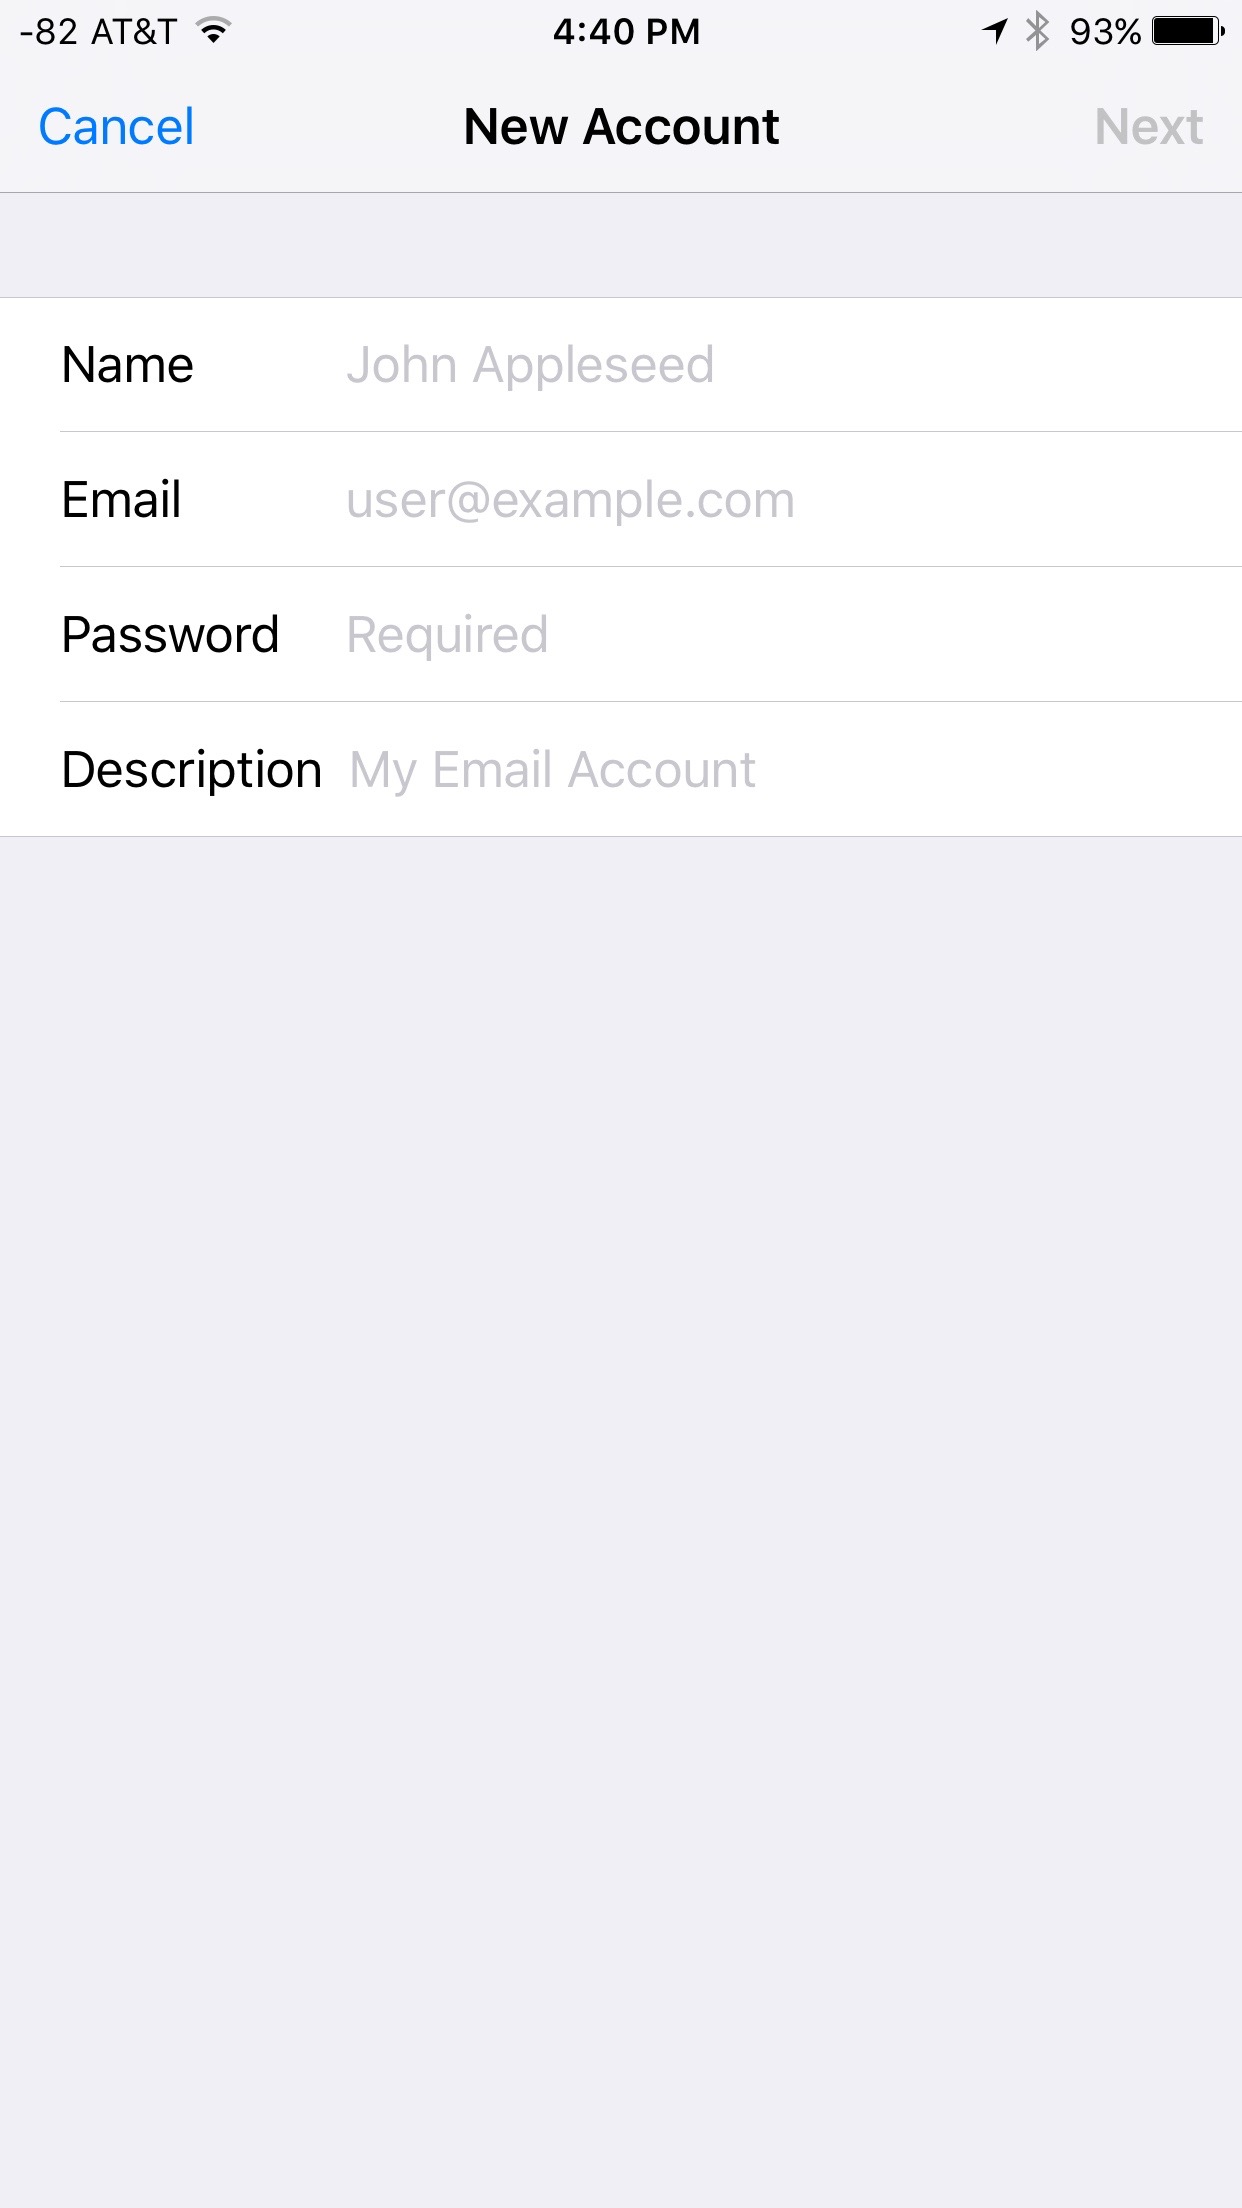
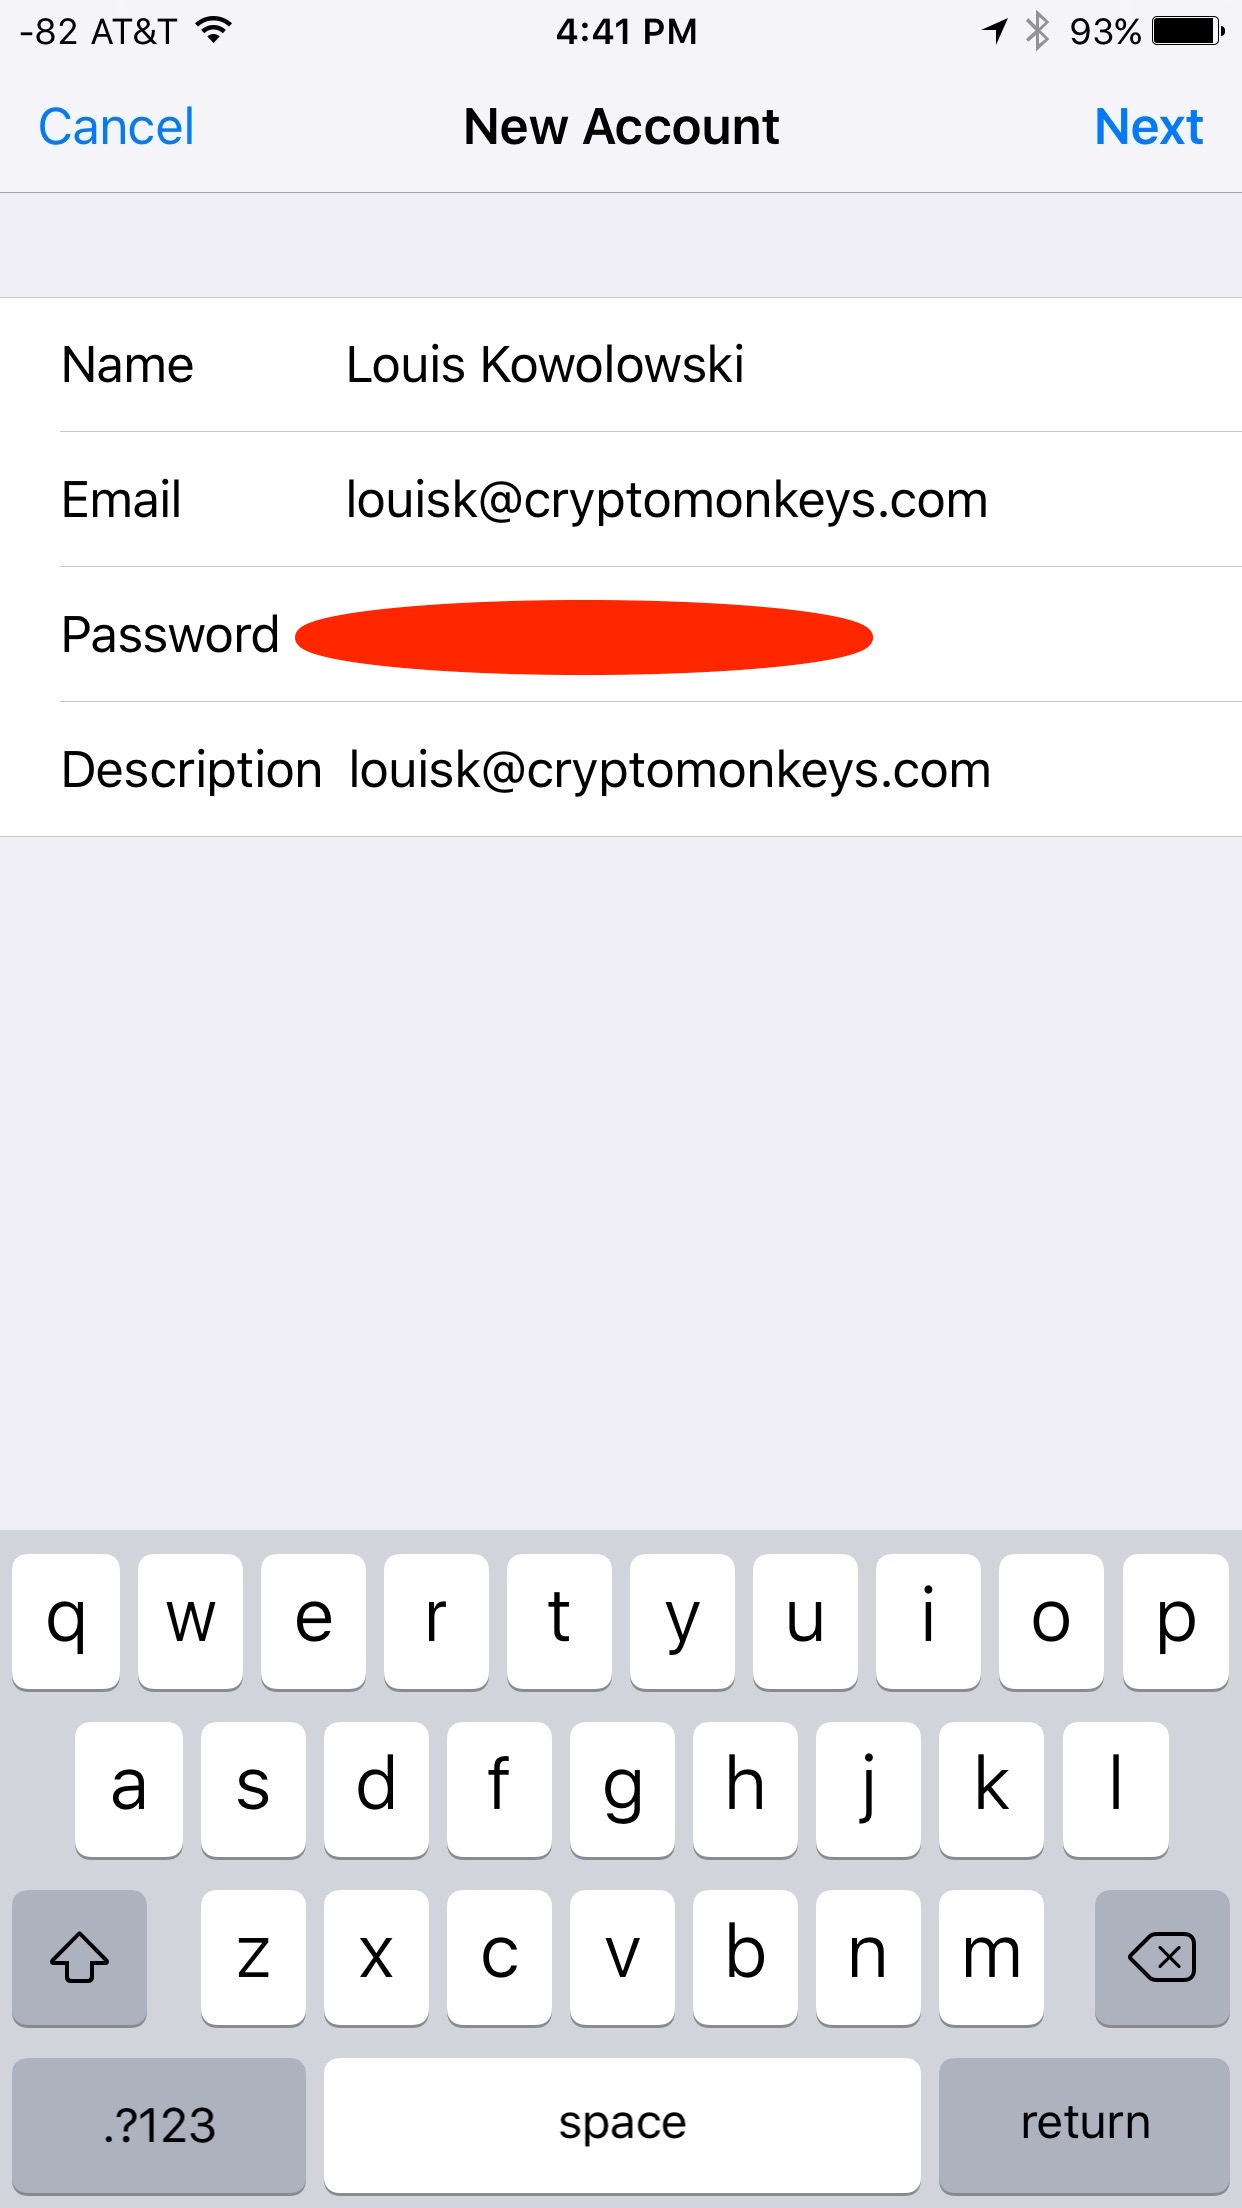
You need to fill in your name, email address, password, and description. Some systems may have special requirements. If so, don’t worry, we can customize things before they become finalized.
| Before | After |
|---|---|
The Mail app will now attempt to figure out what server to connect to. It may or may not get it right. You should now see a screen that allows you to either accept or modify things like server name, username, password. I’m selecting IMAP. If you are connecting to a POP server, make sure you choose the right setting before filling in the information.

Now that you’ve successfully verified the username and password for the account, you can select different options to enable. I’m not sure why you can disable mail, but the option is there if you want it. The other option is for Notes. You can (optionally) have the Notes application store notes with this mail account. Notes can all be stored in the same place (by default, iCloud), or you can have notes with different email accounts. The choice is yours.

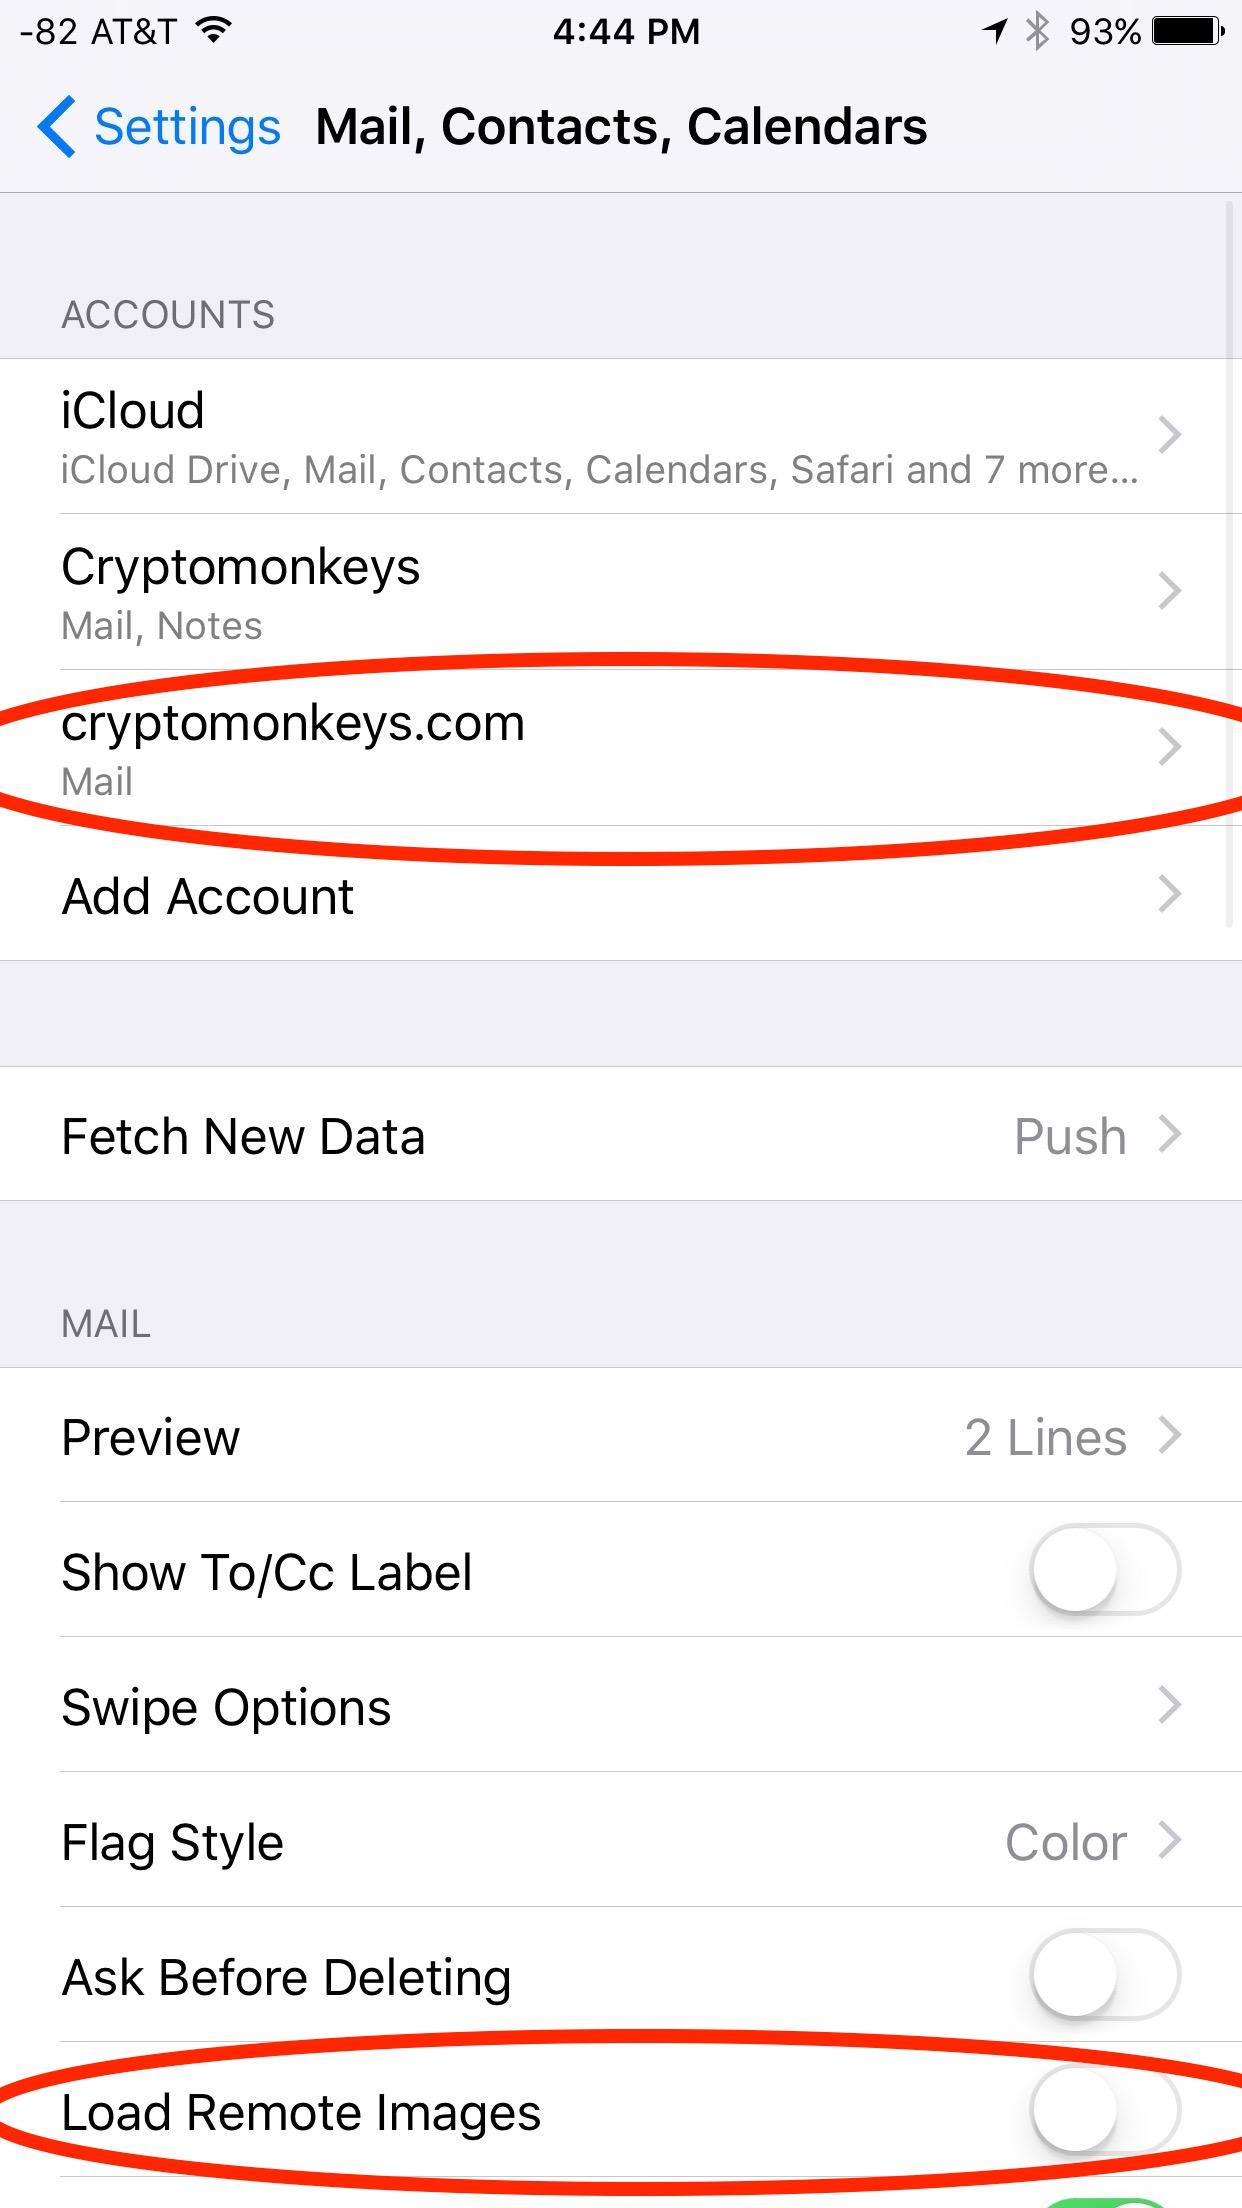
You should now see the account we just created in the heading of accounts. Now is also a good time to disable the loading of remote content. This should be the default if it isn’t already. For any message that has remote content, you can still tell the mail app to load the remote content. In addition to using less bandwidth, it can also break the ability of advertisers to know when you’ve looked at an email (they frequently will put a link to a unique graphic, which may or may not be visible, and if you view the message with remote content, the mail app will request said graphic).
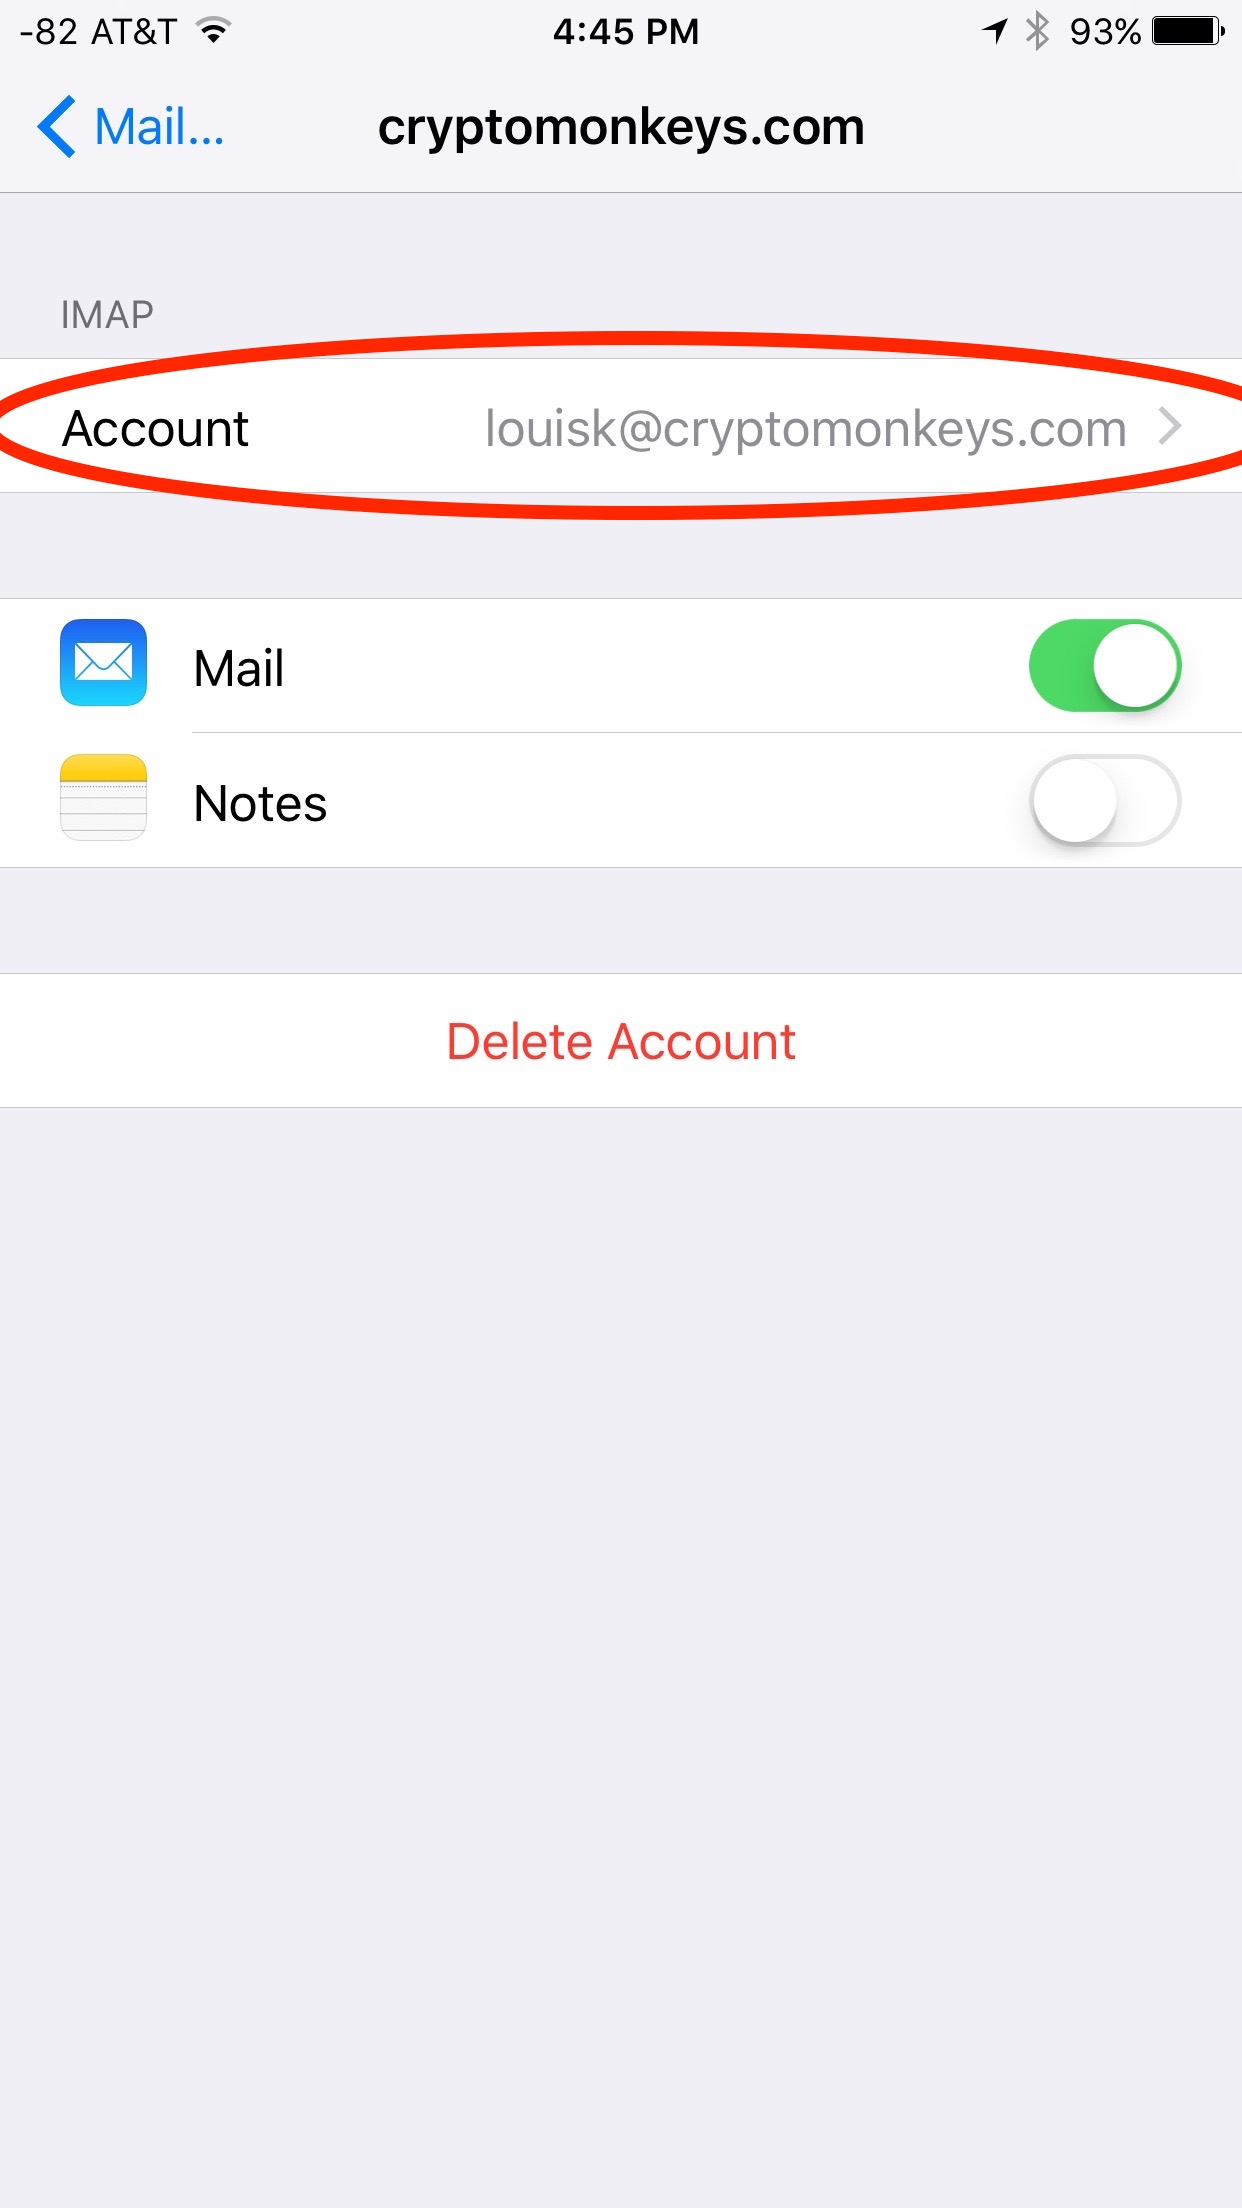
Moving on to the advanced settings, where we can configure encryption (if its not already enabled). Select the account under the “Account” heading. Then choose “Account”.
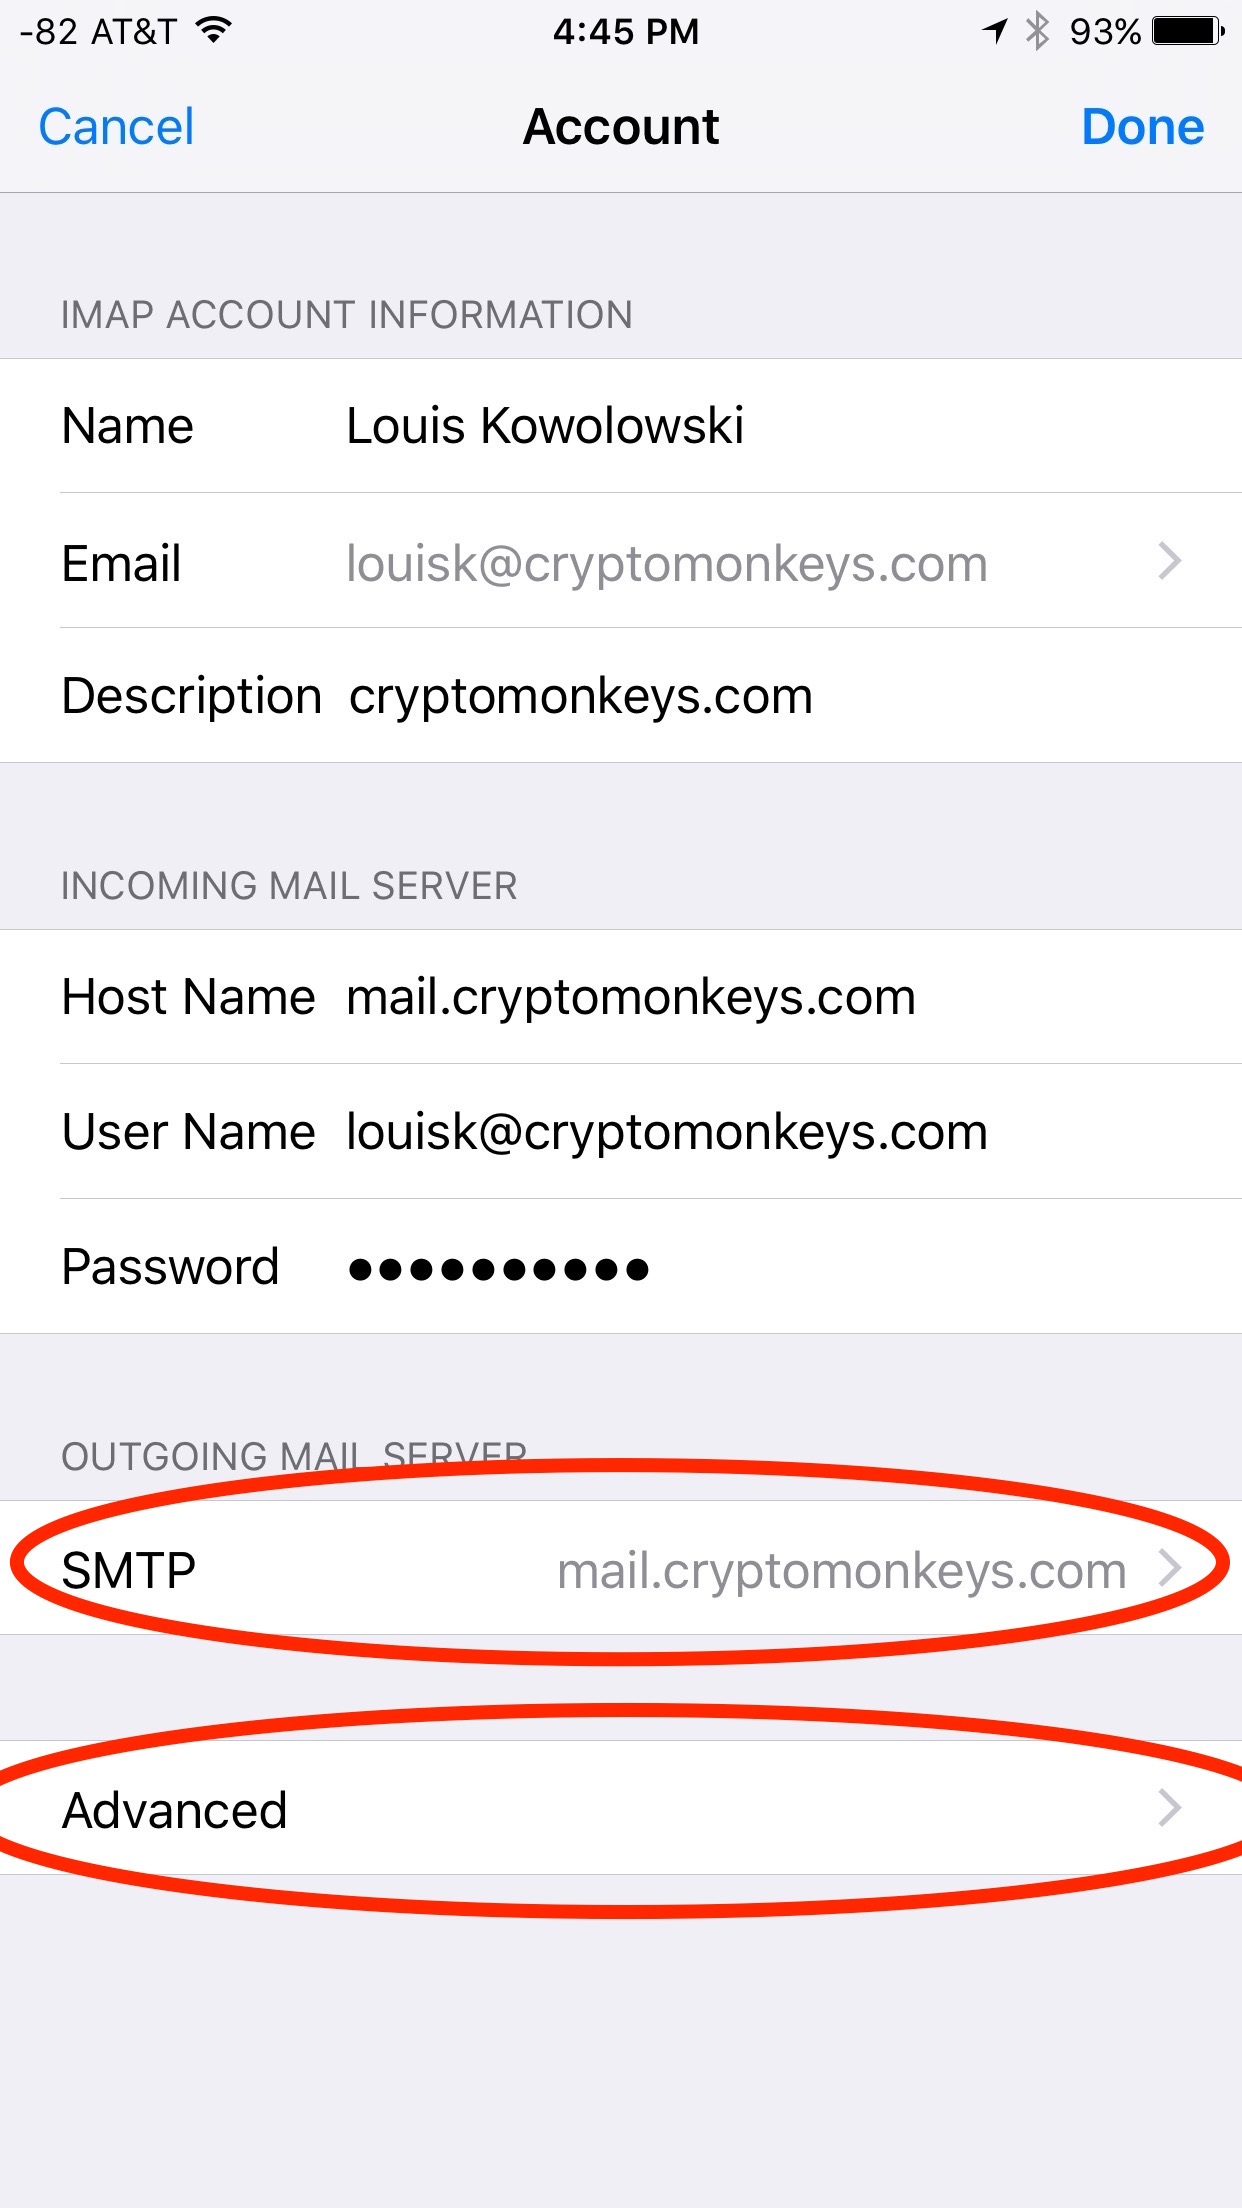
Here, we can select whether we want to customize the settings for the sending server (who we connect to when we wish to send a message), or the receiving server (who we connect to when we get messages). Many times, its the same system, but not always, so its nice to be able to pick and choose.
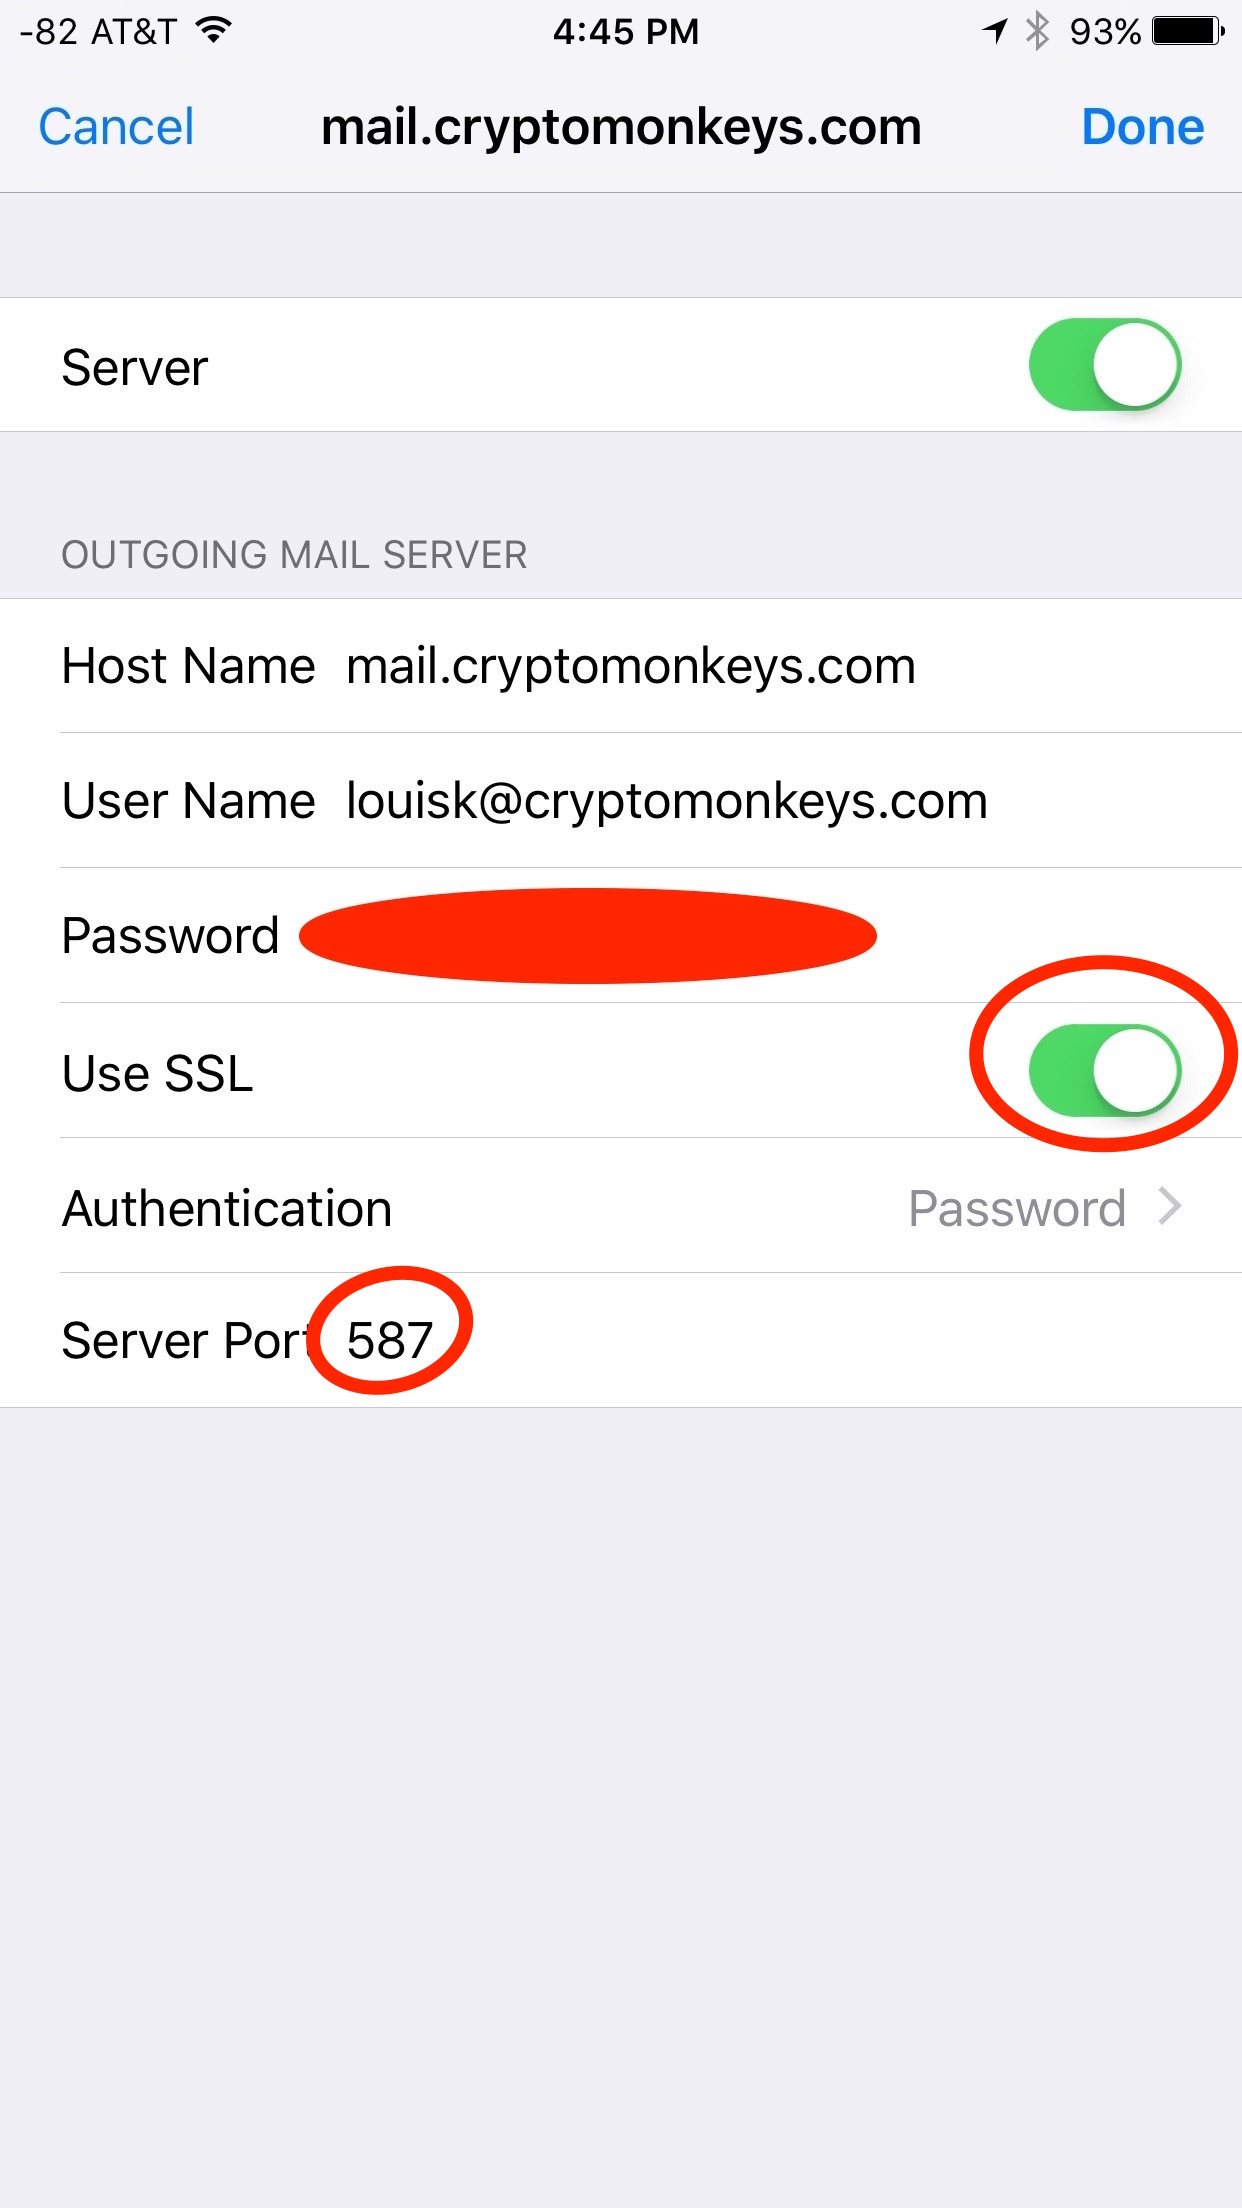
We start with customizing the sending server. We want to ensure that “SSL” is enabled. For “Server Port”, we have may have a choice (depends on how the other end is configured, but its common for both to be enabled). You can choose either 465, or 587. Sometimes, certain networks don’t like people using one port, or the other. Pick one, if it works, no need to change it.
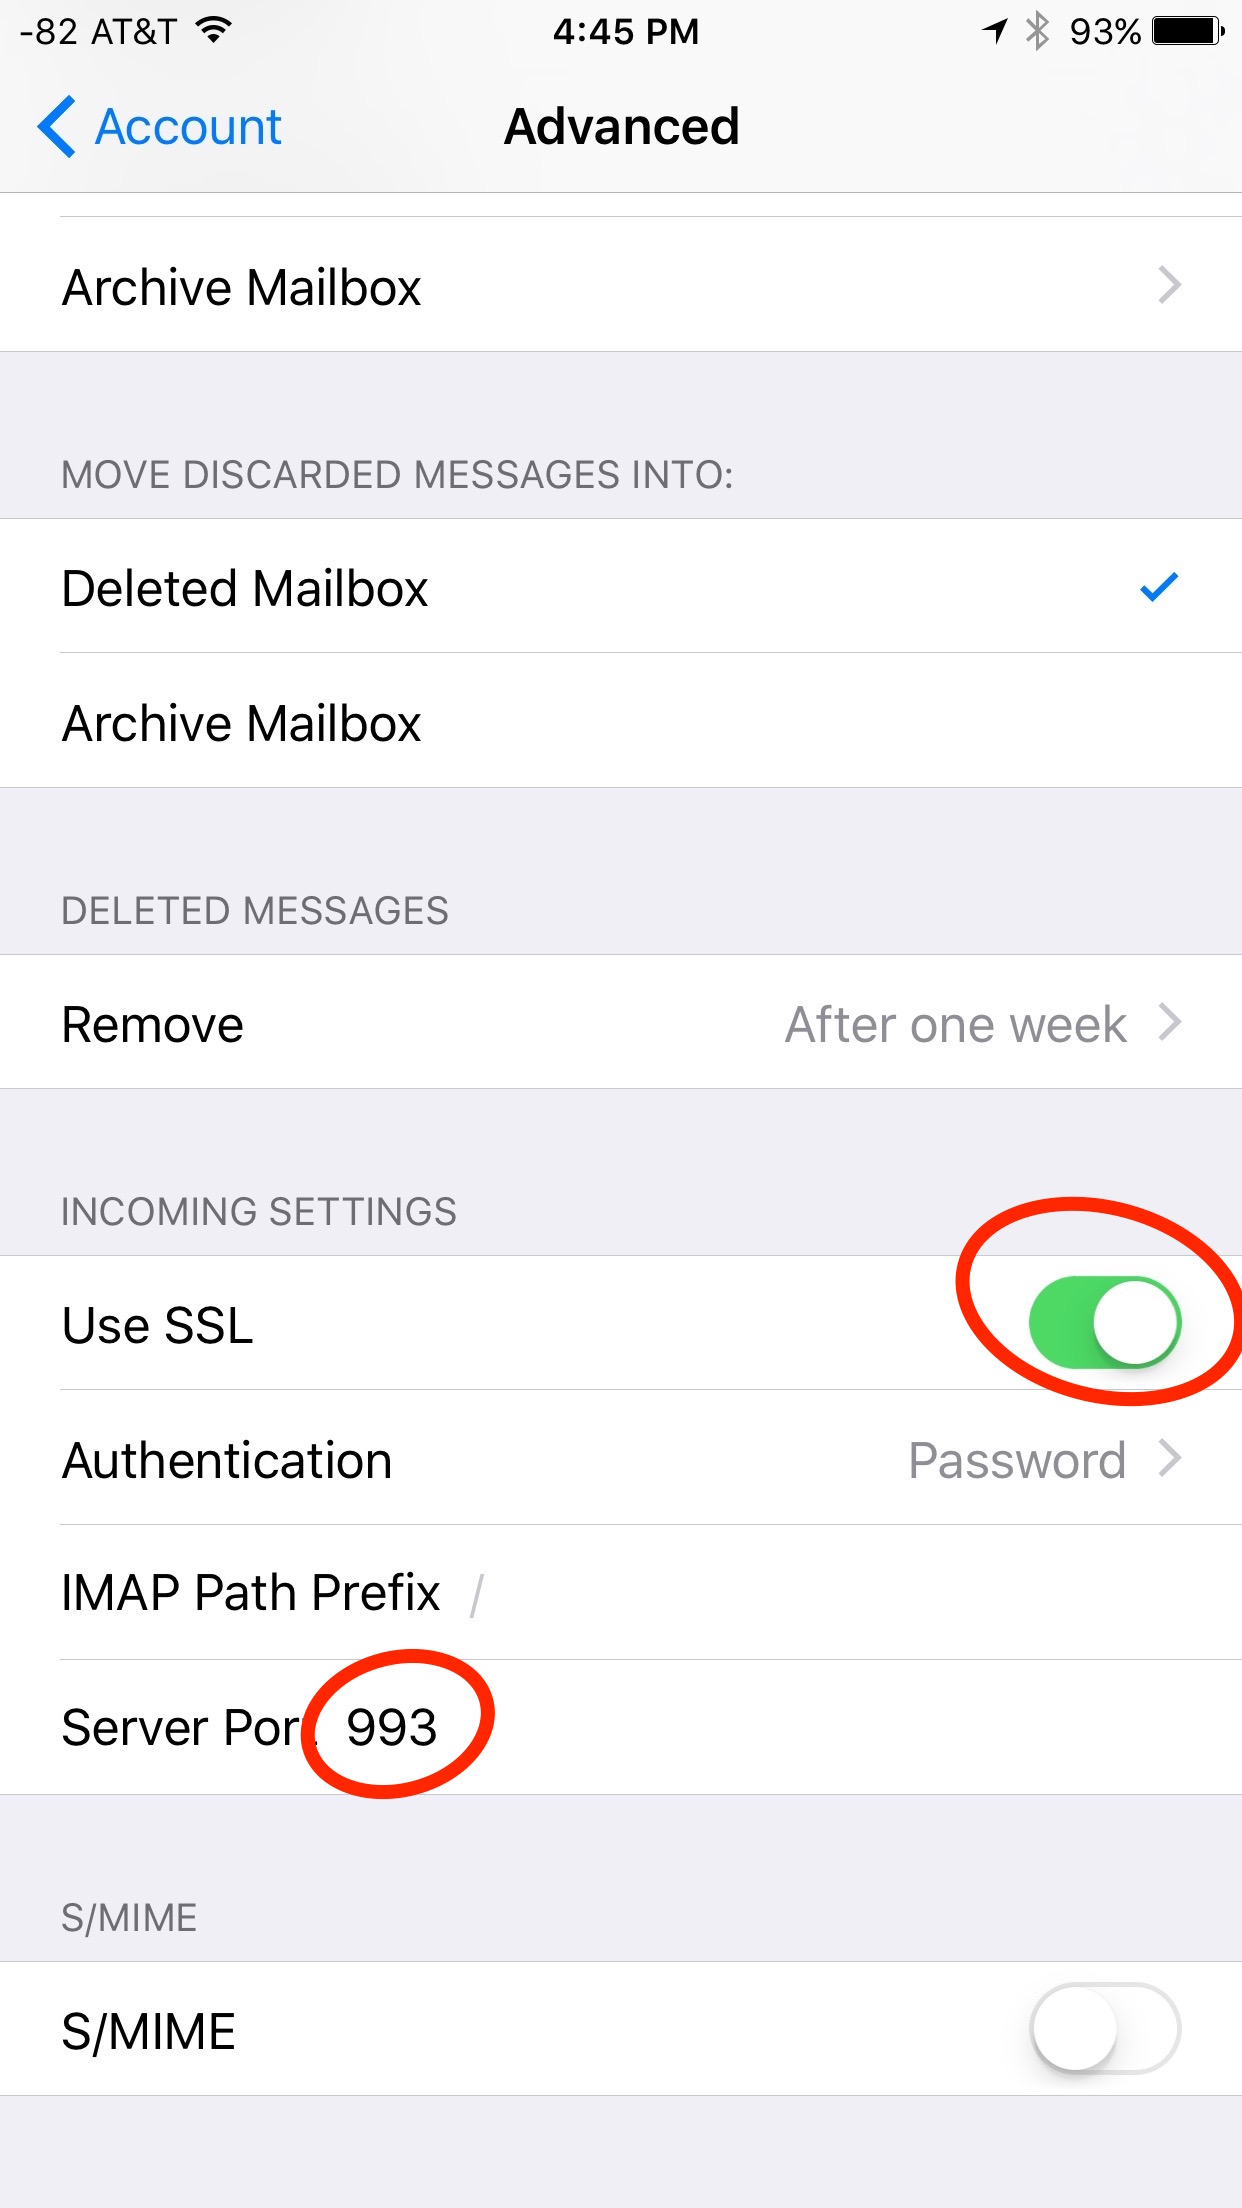
We finish up with customizing the receiving server. Again, we want to ensure that “SSL” is enabled. If you are using an IMAP connection, the port number should be 993. Unlike the configuration for the sending server, there isn’t a selection of ports.
Now, your mail should be encrypted between you and the server, for both sending and receiving.

Comments