This is the first of a multi-post. The end goal is to have on-demand VPN capability from OS X, iOS, and Android (technically, PrivatOS; Blackphone) to a pfSense box that will work on any network where HTTPS is allowed. The first post will cover setting up pfSense and OpenVPN.
The reason pfSense was chosen is that it makes it easy to setup OpenVPN and manage SSL Certificates (such as per-user+device, meaning, if a user loses a device, only that device certificate needs to be replaced and the original . In order to do on-demand VPN, we don’t want to constantly be entering passwords, so we use SSL Certificates on both the client and the server.
Downloading pfSense
Getting pfSense is easy. You can download it here . You can run it on hardware, or virtualized. If you want to run it on hardware, you should check out Netgate . They have some nice hardware that is pfSense certified and not very expensive. If you want to virtualize, you can do so easily with VMware (for this setup, I used VMware ESXi). If you choose to do this, you will need to ensure you have the ability to get traffic from the internet to your virtualized pfSense instance. I leave this as an exercise for the reader, it will be dependent on each network design, and the equipment that is deployed. Installing pfSense is also left as an exercise for the reader.
Note This doesn’t cover setup for other networks, routing, firewalls, etc unless they directly relate to OpenVPN.
pfSense screenshots
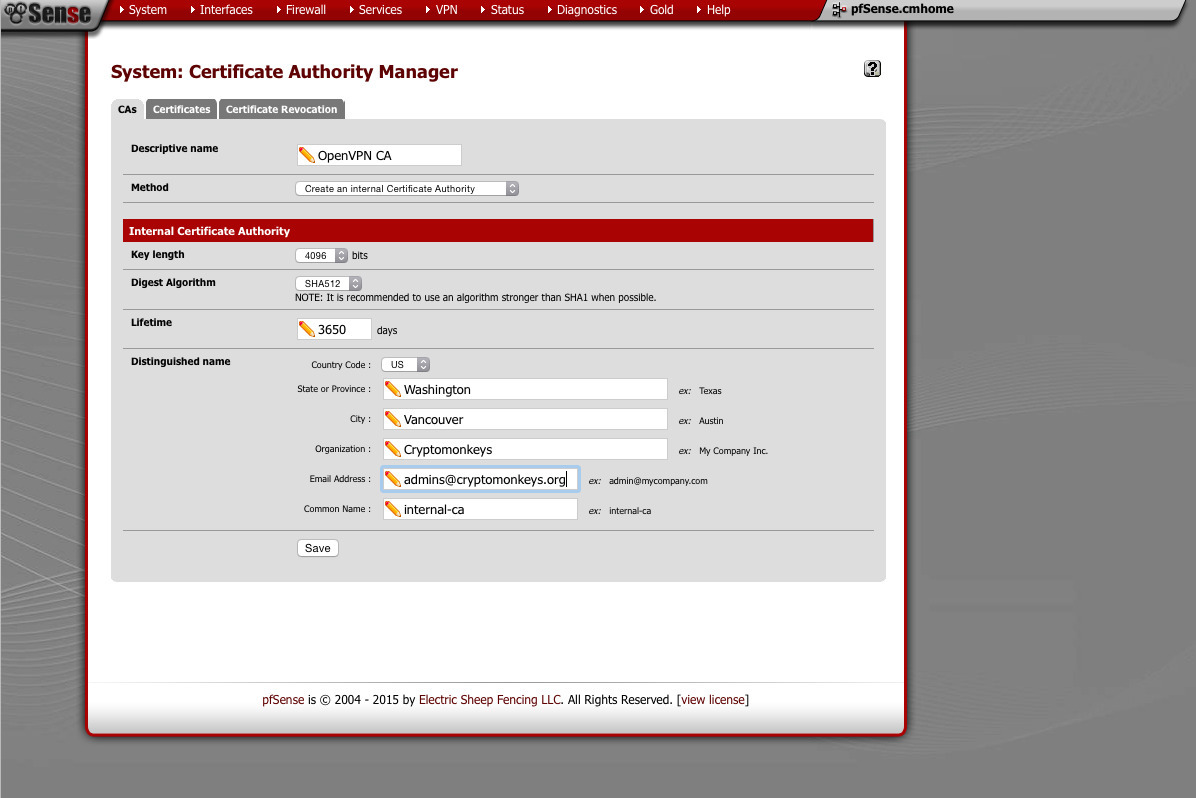
Certificate Management (System -> Cert Manager)
From here, we will create a new CA. We will issue both server and user+device certificates from here. I use 4096 bit key and a SHA512 hash.
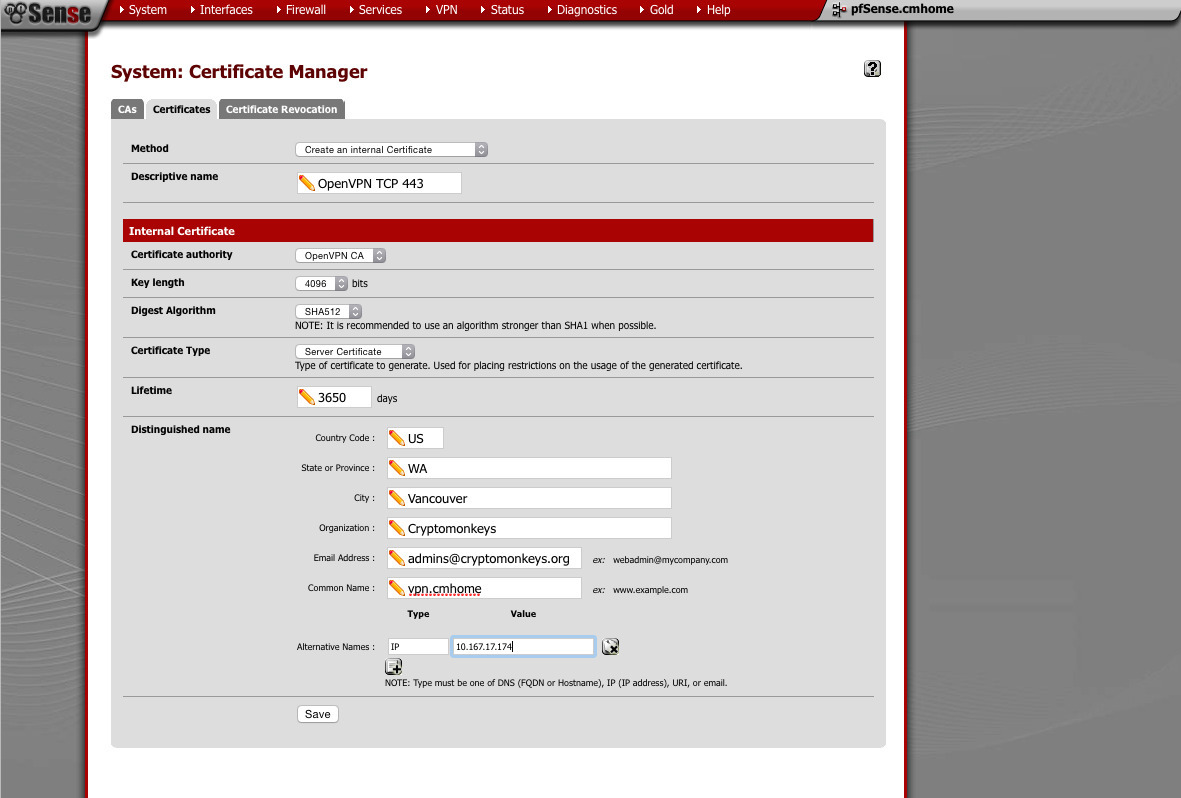
Next, we generate our server certificates. We will need one for each server we wish to run (for example, TCP and UDP). Again, I use 4096 bit key and SHA512 hash. Make sure you choose “server” when selecting the type of certificate.
This is the UDP server certificate. Same as above with the TCP server certificate. Make sure you choose “server” when selecting the type of certificate.

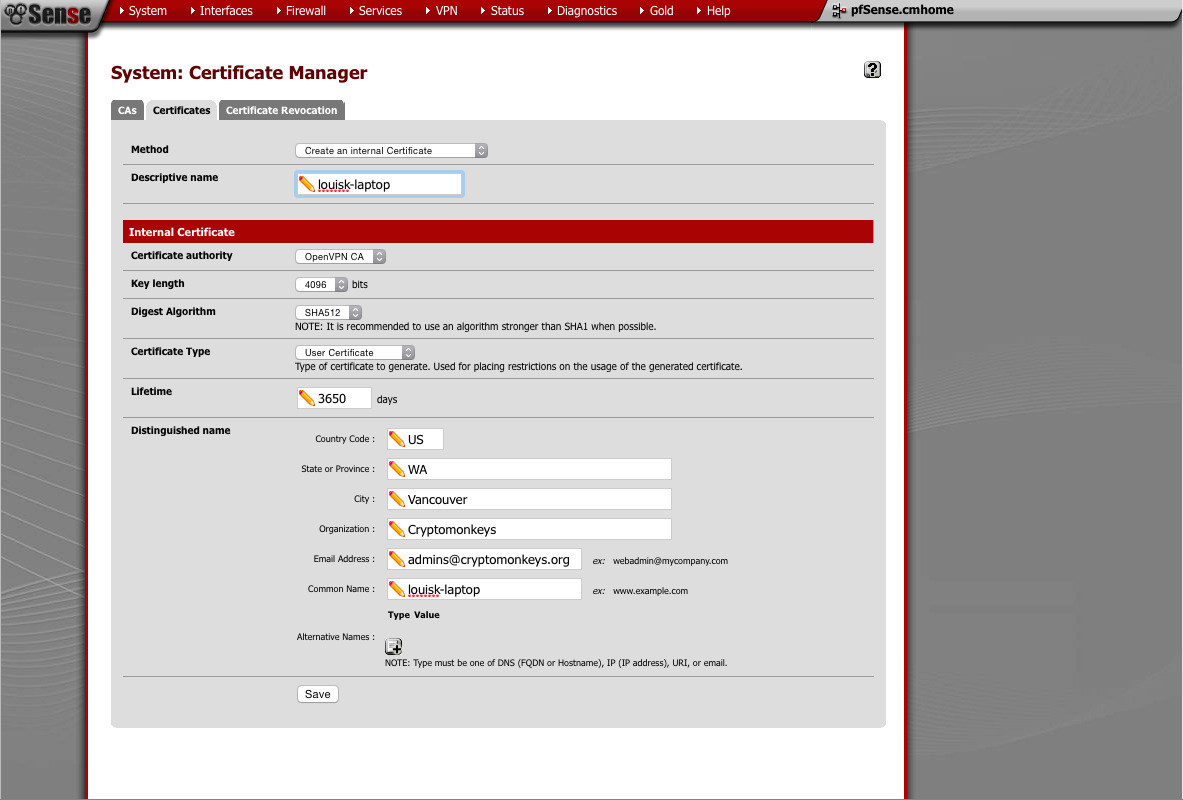
Lastly, we make our user+device certificate. If you have multiple devices (such as laptops), generate one certificate for each. If you have a problem with a device (such as having it lost or stolen), you only need to revoke a single certificate. Using the same parameters as the other certificates, 4096 bit key and SHA512 hash. Make sure this one is a “user” certificate
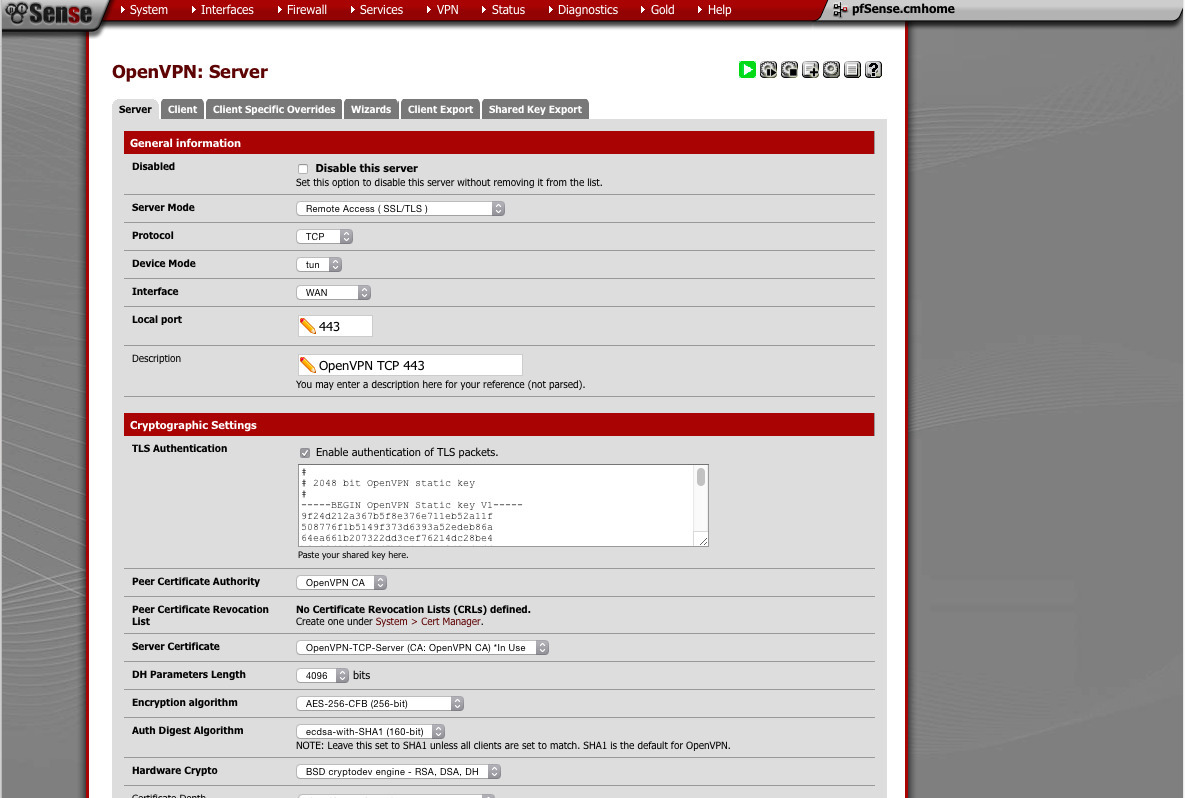
Configuring OpenVPN (VPN -> OpenVPN)
- Server mode: Remote Accesss (SSL/TLS)
- Protocol: TCP
- Device: TUN
- Interface: WAN
-
is open more often than not. Hardly anybody blocks HTTPS).Port: 443 (You can use any port you like. I've found that 443 -
as well. This should be done automatically)TLS Authentication: check (should have a 2048bit key pasted in - CA: Choose the CA we created
- Server Certificate: Pick the TCP one
- DH Parameters: 4096
- Encryption: AES-256
- Auth-Digest: ECDSA with SHA1
- Hardware Crypto: BSD
-
Tunnel Network: This must not be assigned to any other interface. -
Redirect Gateway: If you want full tunnel, check this. -
Concurrent connections: Set this to something reasonable - Compression: Enabled+Adaptive
-
such as VoIPIP TOS: This allows you to get priority for tunnel'd traffic -
IP changes.Dynamic IP: Allow clients to retain connection if their - Provide a virtual adapter to clients

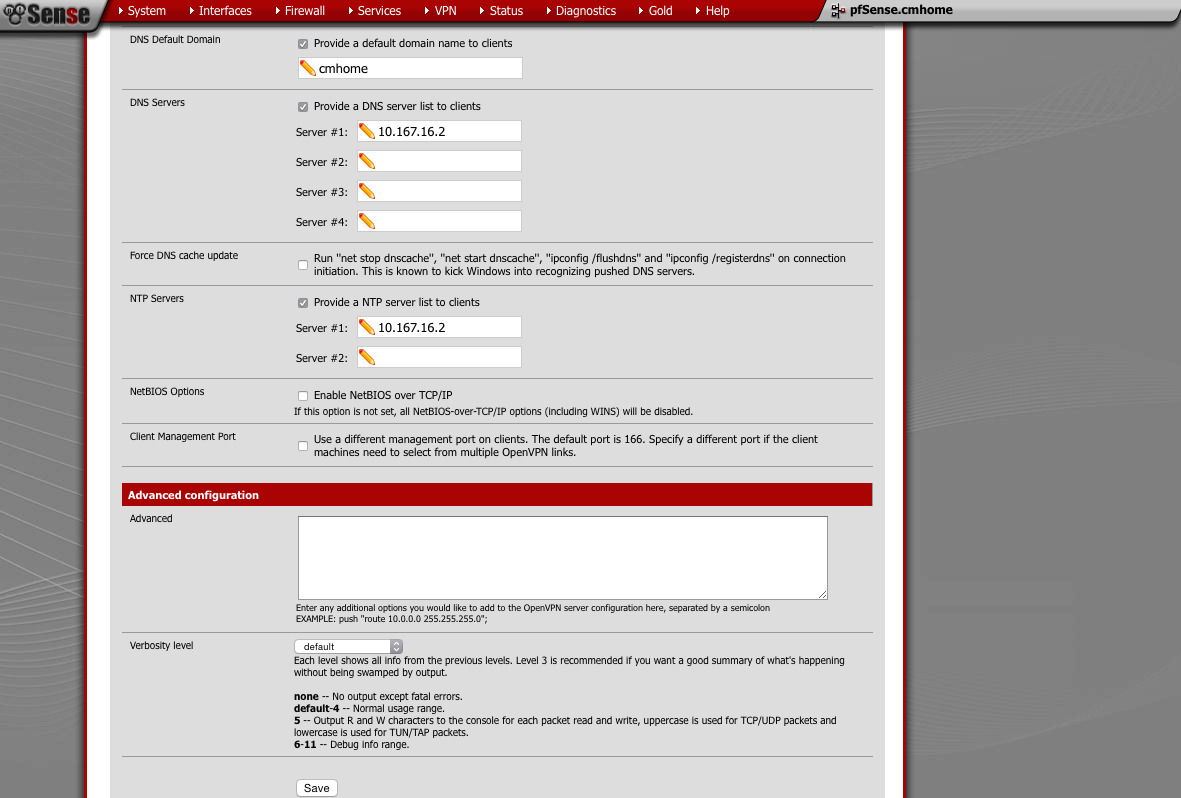
- Provide default domain: yes or no
-
DNS server: something appropriate (pfSense will provide this if you want) - NTP server: something appropriate (pfSense will provide this if you want)
Add another server. This time, we will use UDP instead of TCP
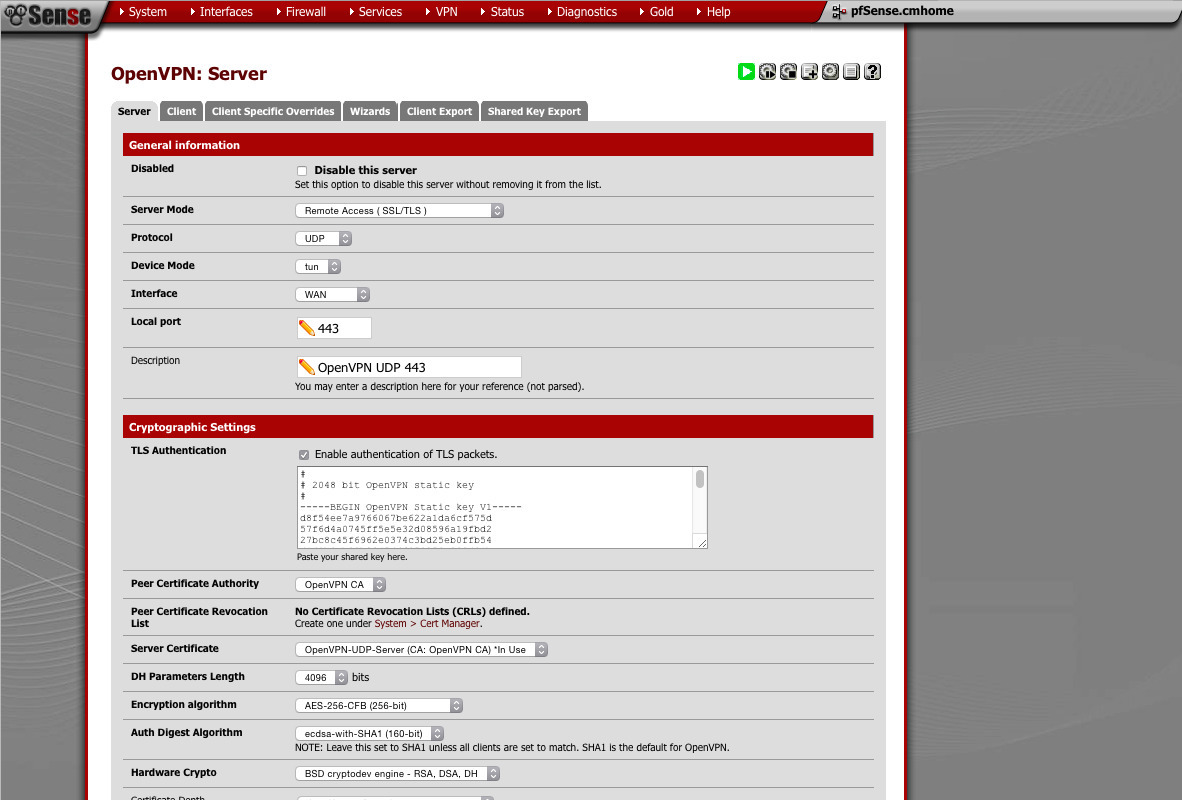
- Server mode: Remote Accesss (SSL/TLS)
- Protocol: UDP
- Device: TUN
- Interface: WAN
-
is open more often than not. Hardly anybody blocks HTTPS).Port: 443 (You can use any port you like. I've found that 443 -
as well. This should be done automatically)TLS Authentication: check (should have a 2048bit key pasted in - CA: Choose the CA we created
- Server Certificate: Pick the UDP one
- DH Parameters: 4096
- Encryption: AES-256
- Auth-Digest: ECDSA with SHA1
- Hardware Crypto: BSD
-
Tunnel Network: This must not be assigned to any other interface. -
Redirect Gateway: If you want full tunnel, check this. -
Concurrent connections: Set this to something reasonable - Compression: Enabled Adaptive
-
such as VoIPIP TOS: This allows you to get priority for tunnel'd traffic -
IP changes.Dynamic IP: Allow clients to retain connection if their - Provide a virtual adapter to clients
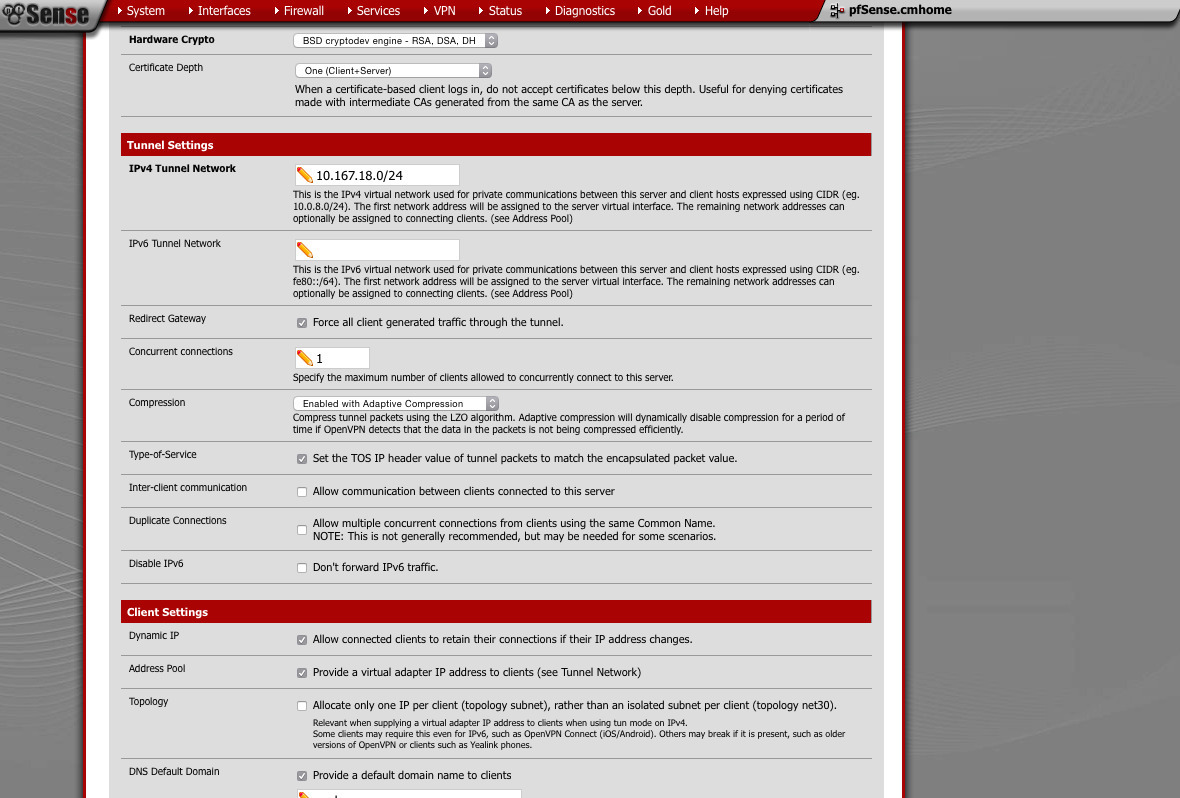
- Provide default domain: yes or no
-
DNS server: something appropriate (pfSense will provide this if you want) - NTP server: something appropriate (pfSense will provide this if you want)

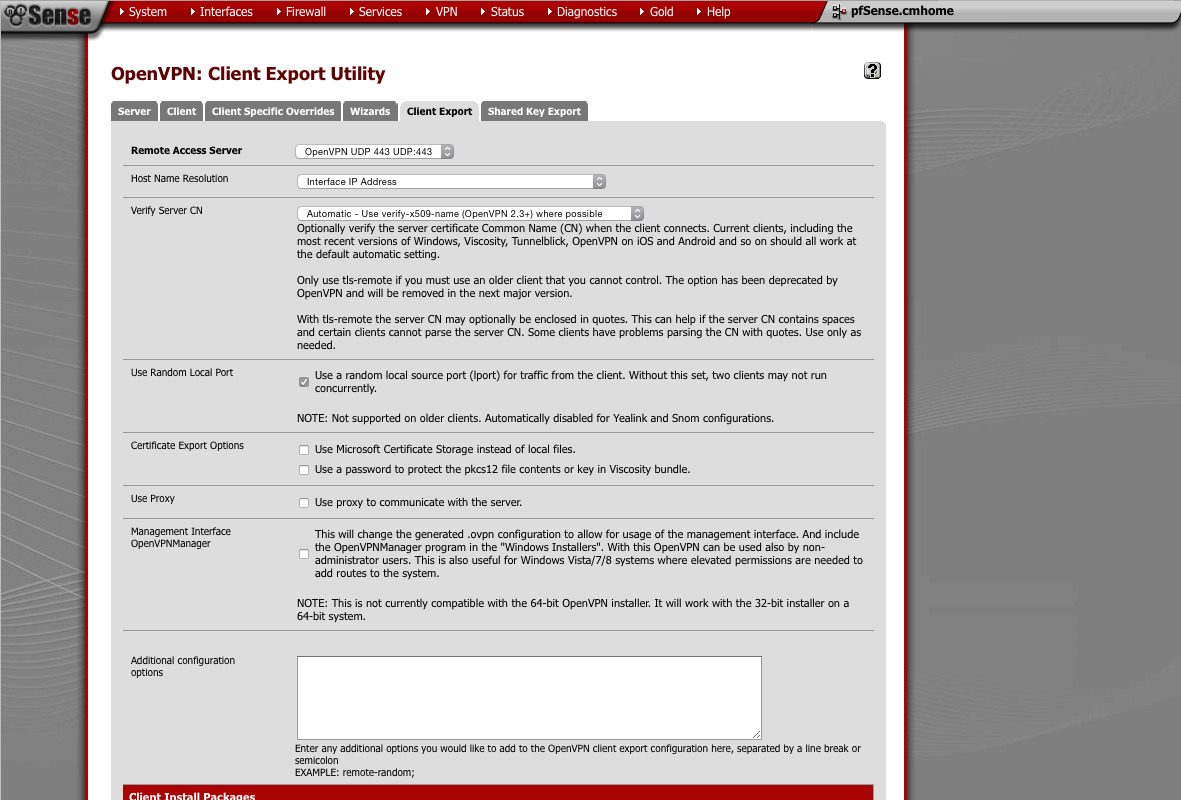
Exporting a client profile/bundle
- Remote Access Server: TCP
- Host name resolution: IP
- Verify Server CN: Automatic
- Random Local Port: Checked

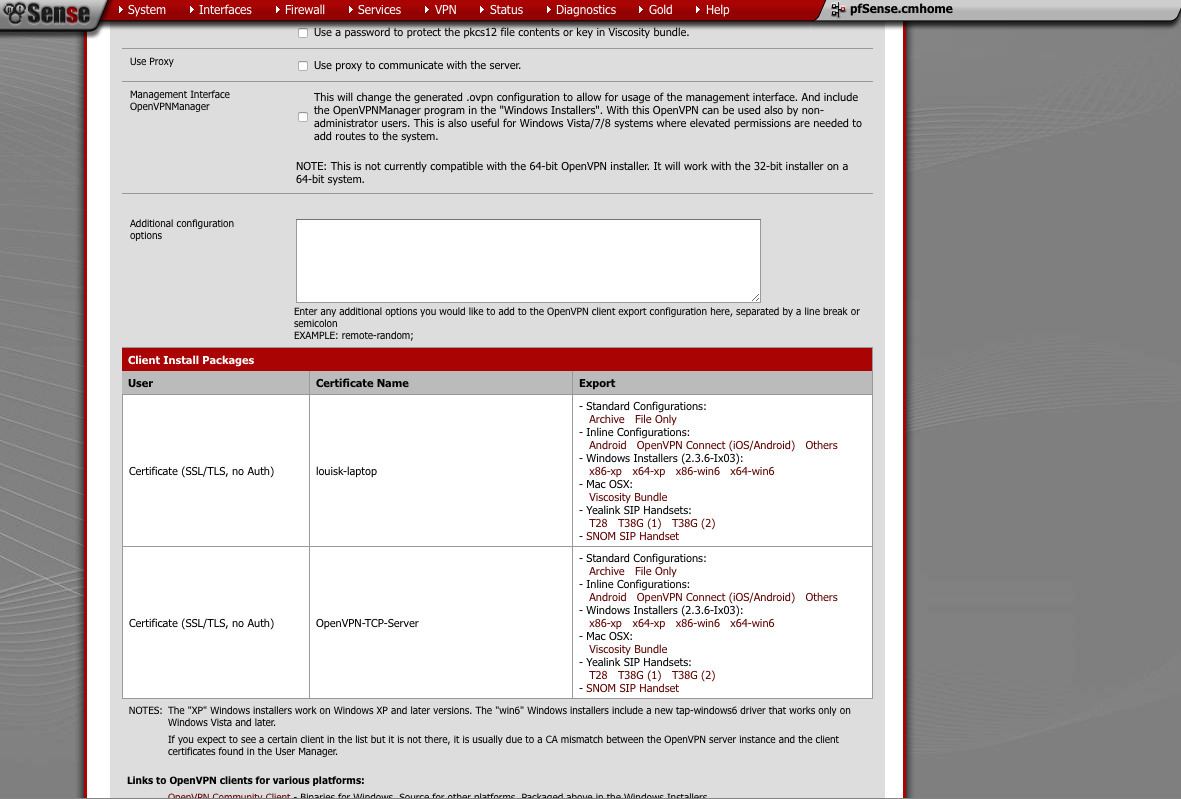
Find the User+device certificate you want to export. Click on the Viscosity bundle link. You can now import this into the Viscosity client on OS X.
Exporting a client profile/bundle
- Remote Access Server: UDP
- Host name resolution: IP
- Verify Server CN: Automatic
- Random Local Port: Checked
Find the User+device certificate you want to export. Click on the Viscosity bundle link. You can now import this into the Viscosity client on OS X.

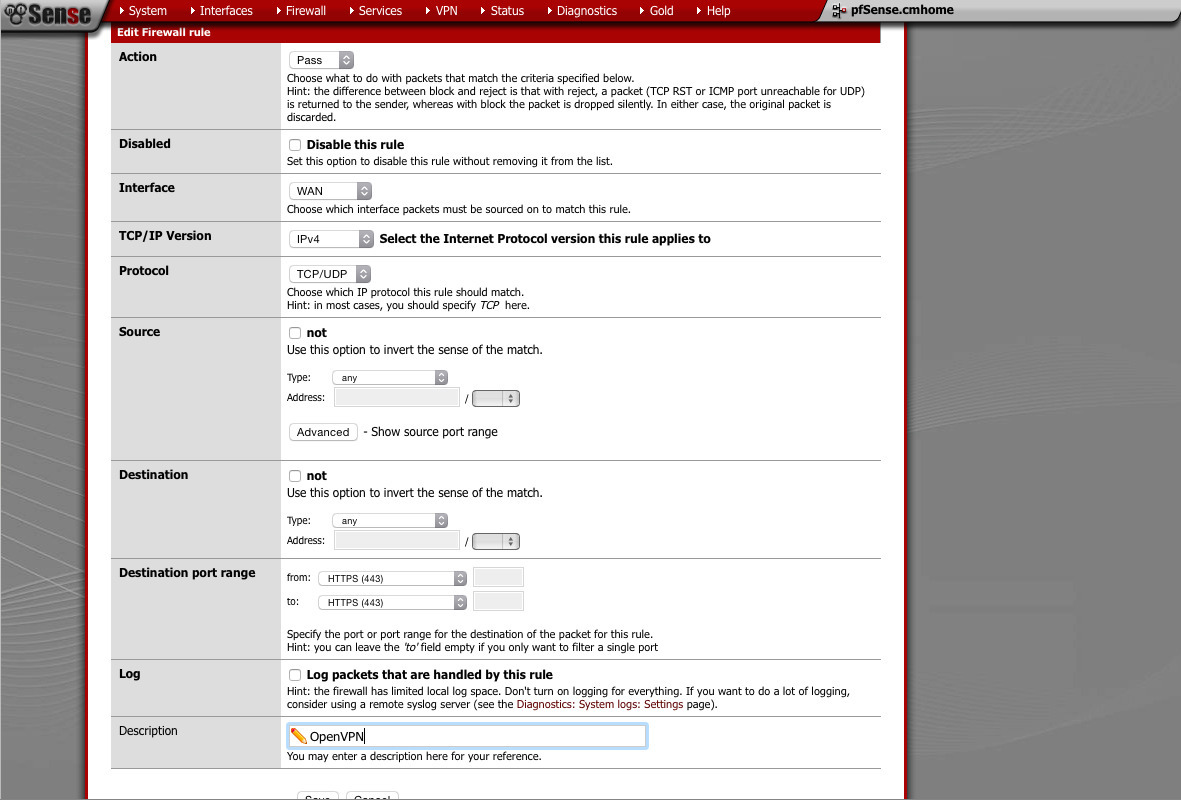
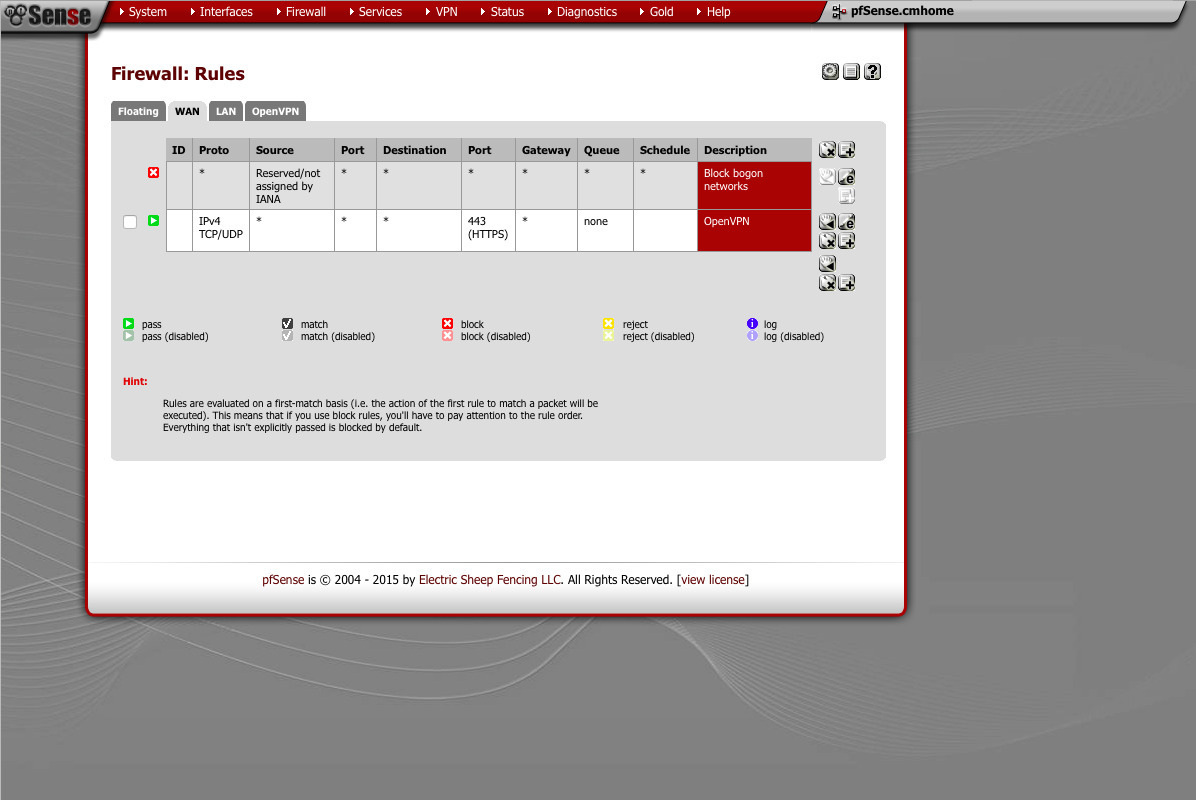
Firewall rules (Firewall -> rules)
Under the WAN interface, you need to create a rule that will allow both TCP and UDP port 443. Don’t forget to apply the changes. With out this, your VPN will refuse to connect quickly.
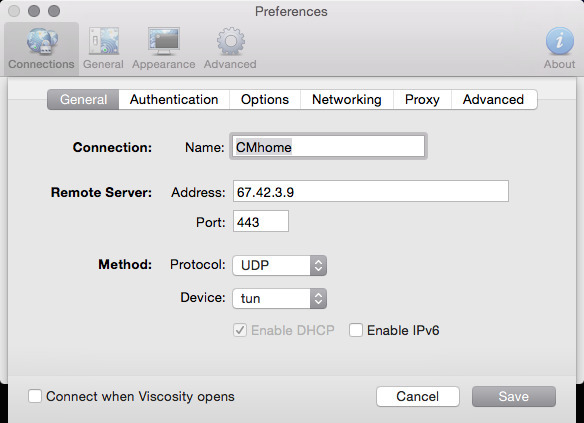
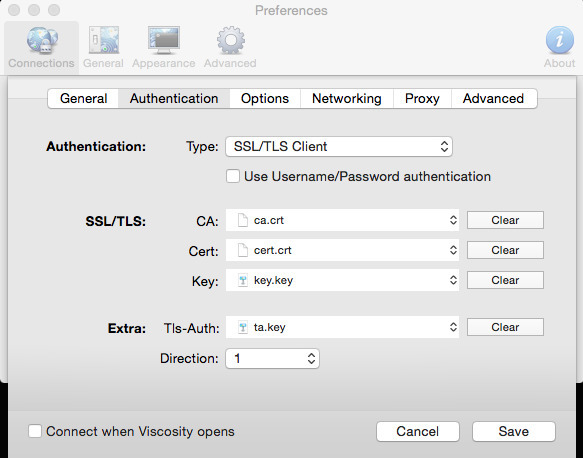
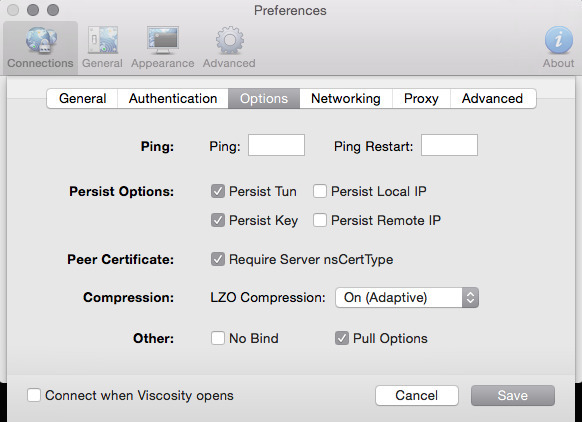
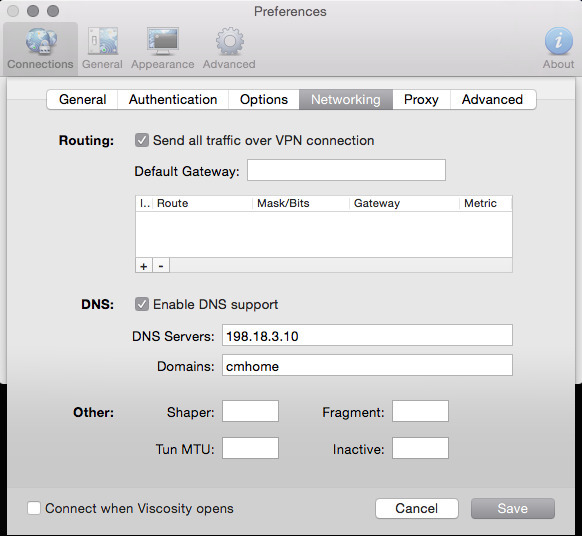
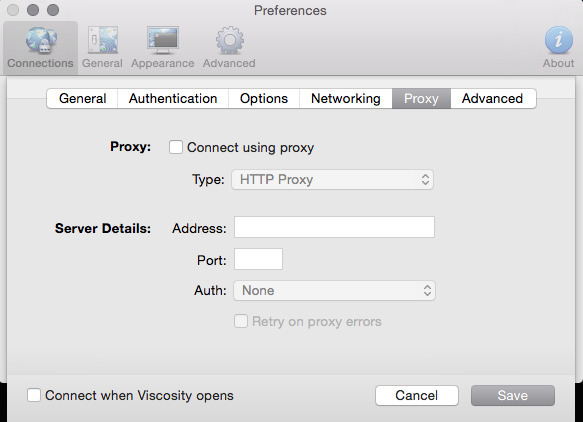
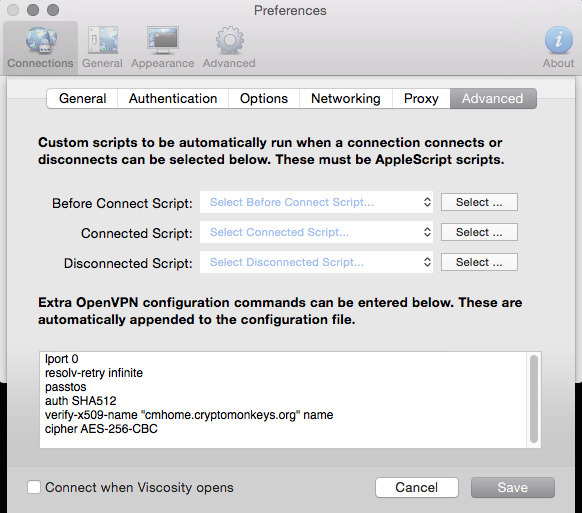
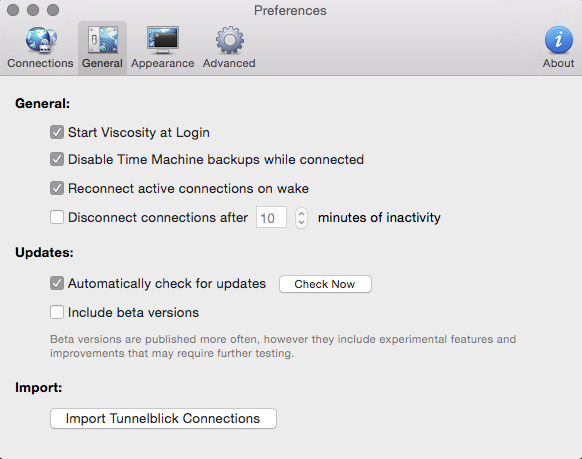
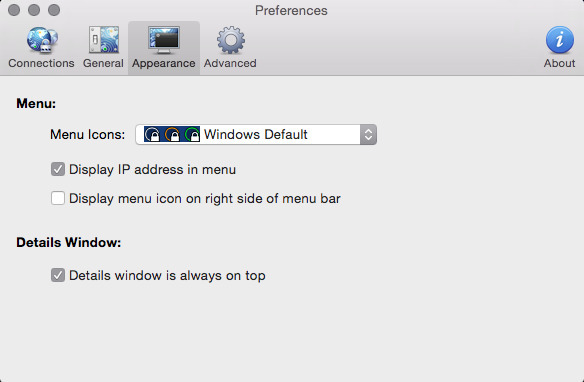
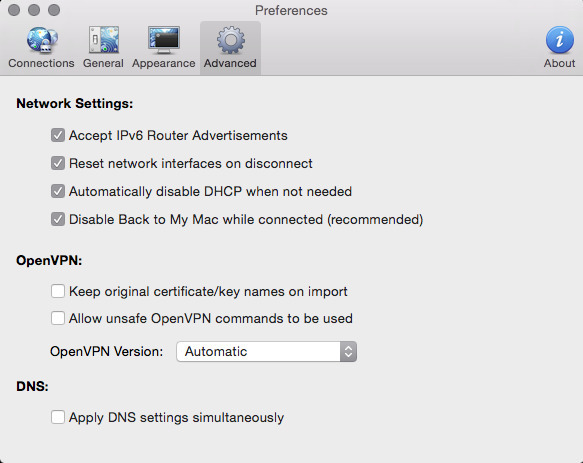
You should now have 2 Viscosity bundles you can import. If you haven’t already downloaded Viscosity, you can find it here . You can use any OpenVPN client you want. I chose viscosity because the tool exports the bundle for me. Its convenient. Below is a table with the 10 screenshots of what your preferences should look similar to. The last few are not relevant to the VPN itself, but I figured I’d include them anyway.
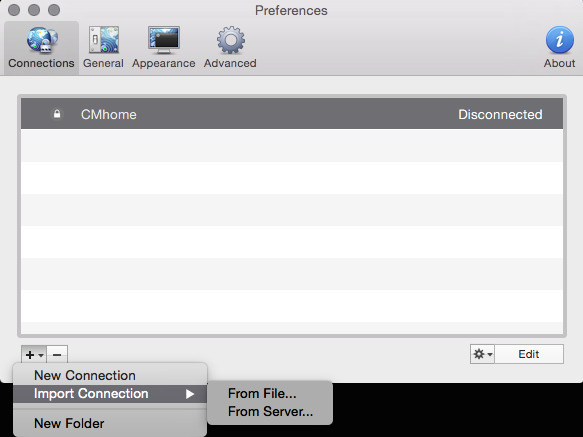
Now it should be time to test your work. If everything went well, you should be able to choose the icon in the menu bar with a circle and padlock and select your connection. It will probably take a couple seconds, and then it should show you’ve connected. You should now be able to access resources on the other end of the VPN.

Comments